1 – As a first step, you need to put down an exterior facade. You can use any of the facades from lib/airport/hangars/flat/xxx.fac. Make sure the shape is orthogonal (CTRL + Q).
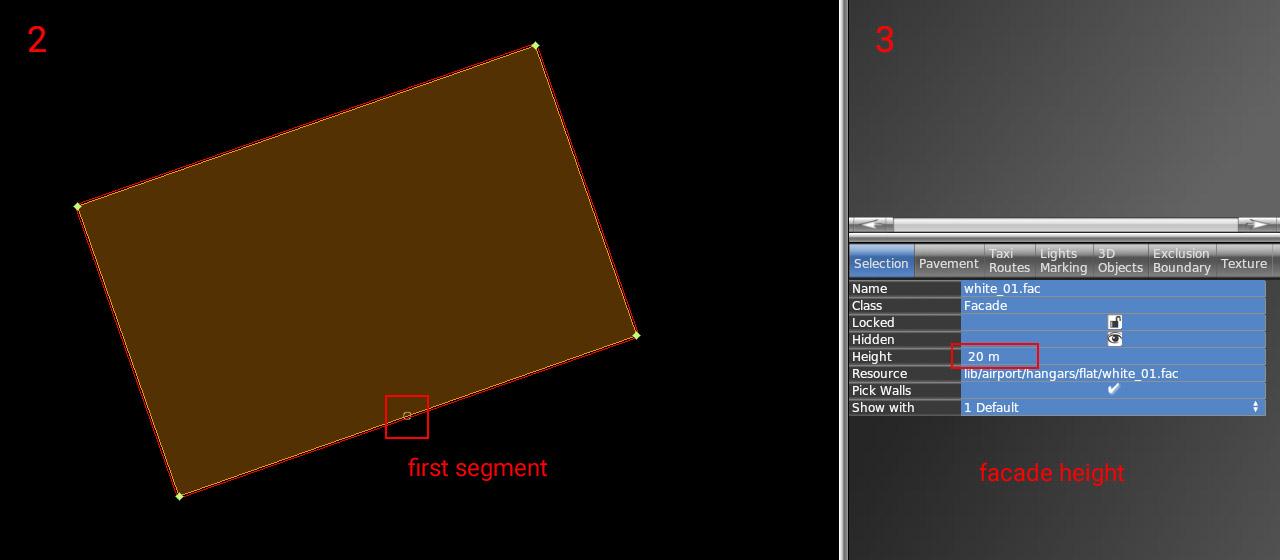
2 – Rotate the polygon (CTRL + R) until you get the first segment (marked with a small circle) to the place where the open doors should be. This is very important for future steps (aligning interior facade and doors)
3 – Set the desired height of the hangar (8, 10, 12, 16, 18, 22, 26, or 30). This is very important because the exact dimensions of openings and related parts may vary based on facade height.
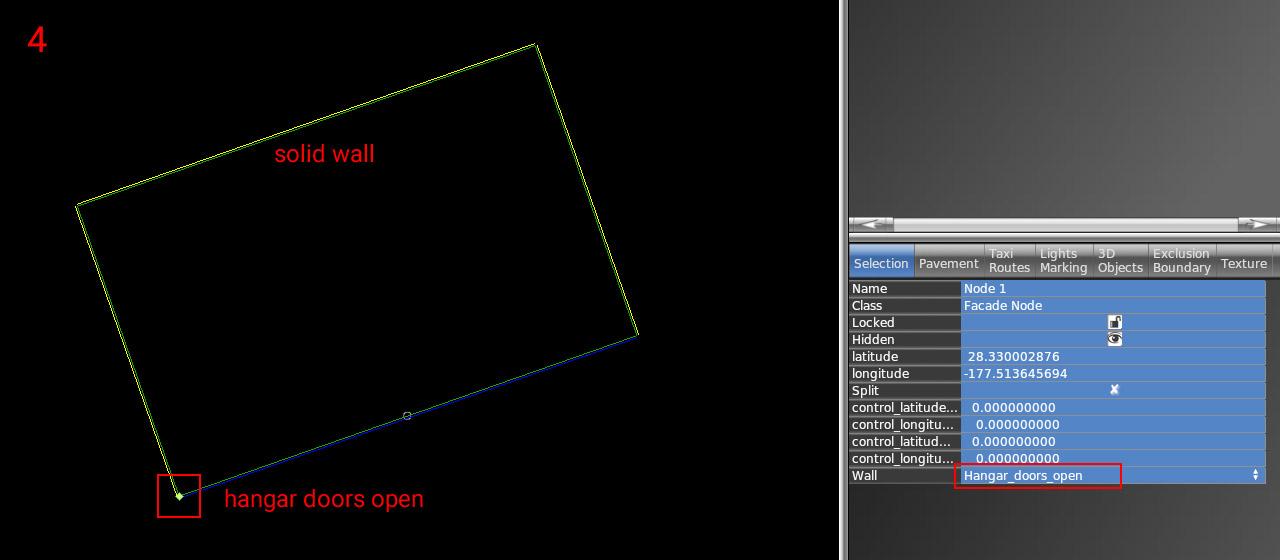
4 – Now set the correct wall types inside vertices. The most important is of course open doors (blue segment). For others, you can use whatever you need (solid walls, windows, etc).
5 – The exterior part is finished. Lock the shape to prevent unwanted edits (turn on the lock icon).
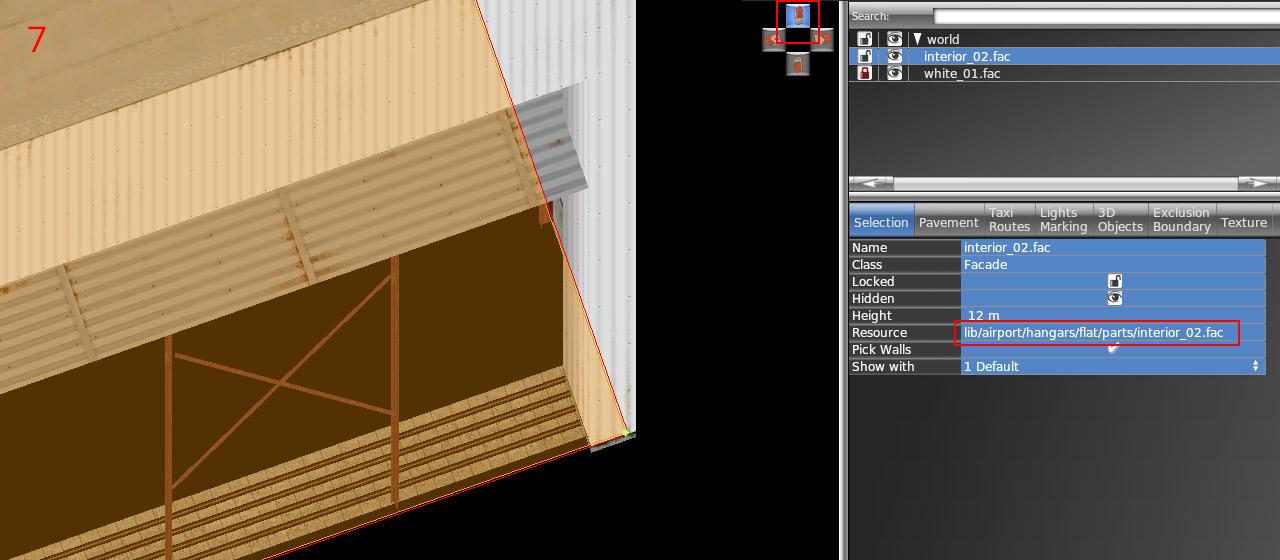
6 – Draw the hangar interior (lib/airport/hangars/flat/parts/interior_xx.fac) following the exact shape of the exterior. Use "snap to vertices" function. You should not break the exterior shape because it is locked.
7 – Make sure WED preview is turned on (menu View / Toggle Preview). Zoom to the hangar corner and use an appropriate isometric view.
8 – Set the corresponding height of the interior (7, 9, 11, 15, 17, 21, or 29). Note the height is one meter shorter than the exterior.
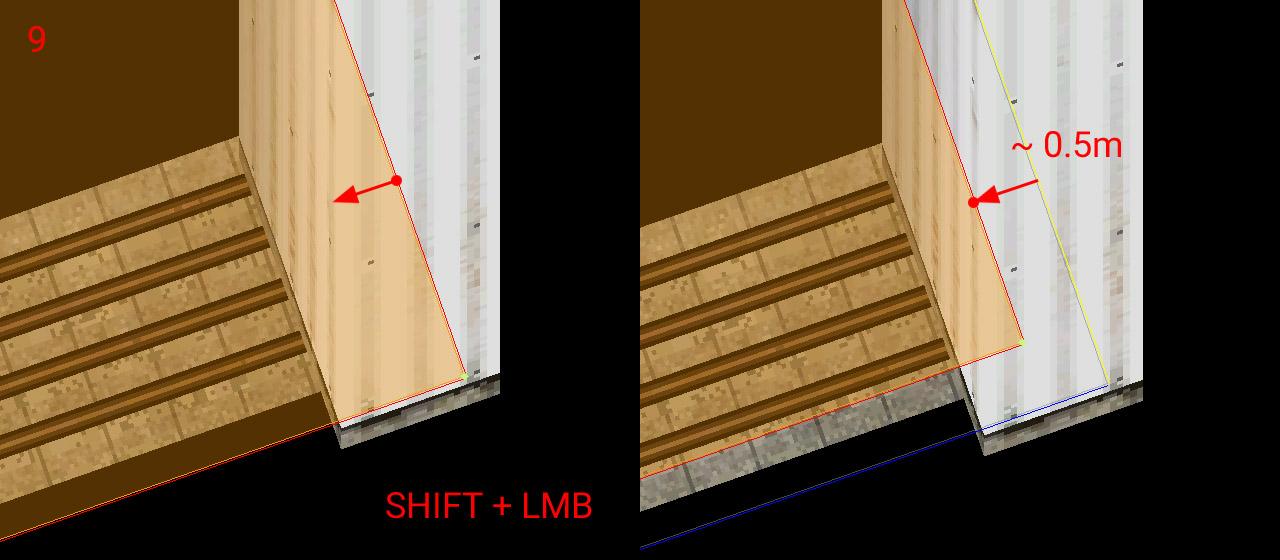
9 – With SHIFT pressed, drag the polygon toward the inside roughly 0.5 meters.
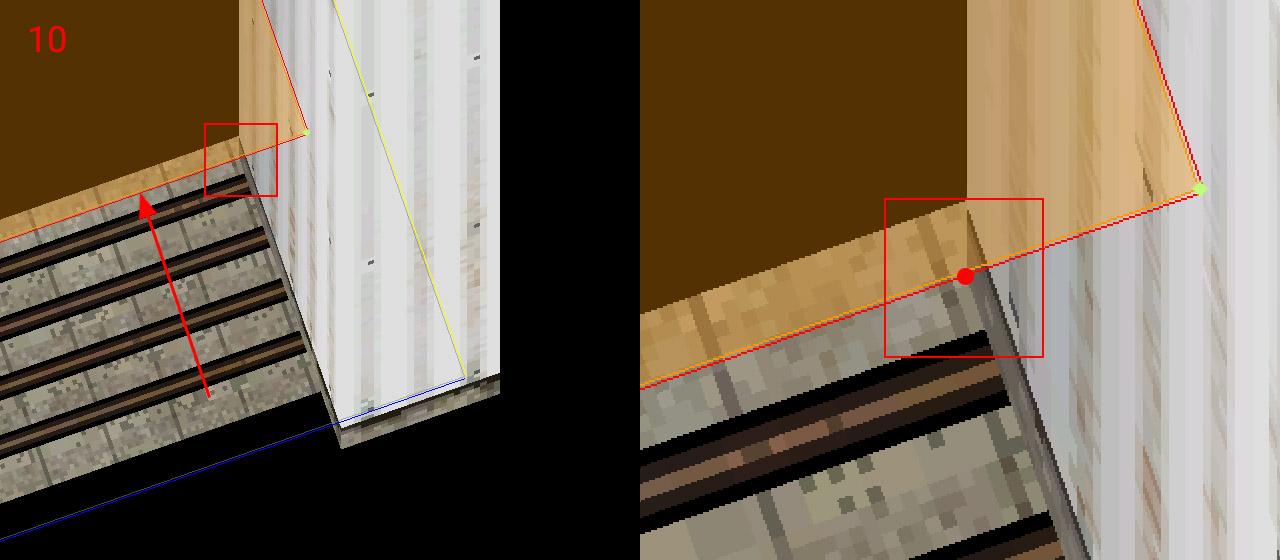
10 – Drag the segment with open doors towards the inside until reaches the end of the opening side. Make sure you're dragging only the single polygon segment (two vertices at a time), not the entire interior polygon.
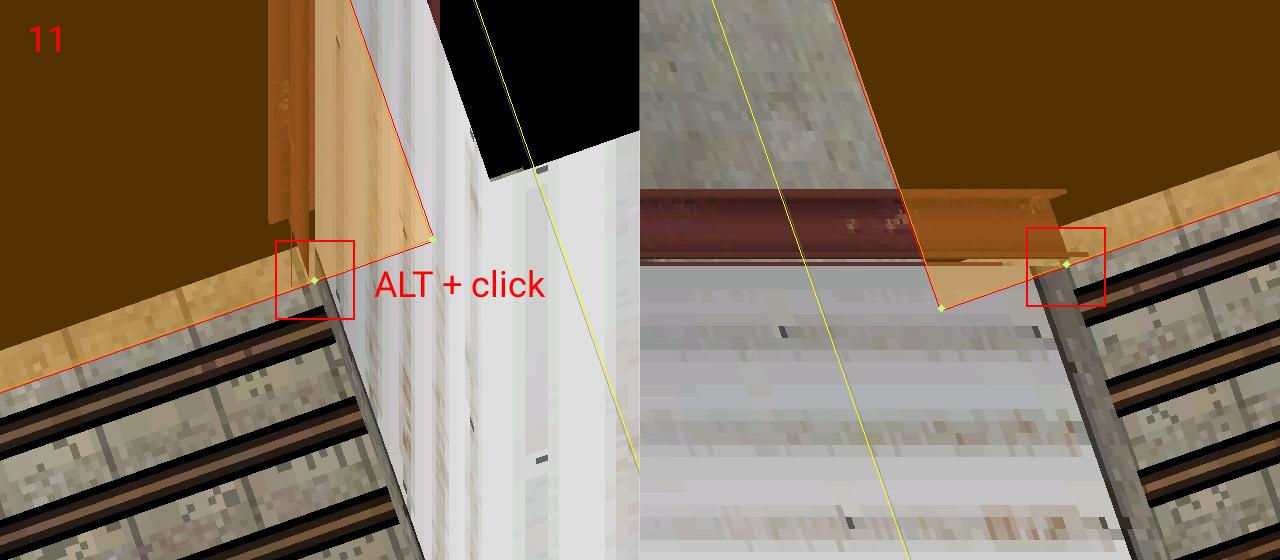
11 – Add a new vertex (using ALT + click) to the intersection of the polygon with the opening. Do the same on the opposite side of the doors (with an appropriate isometric view angle)
12 – Now rotate polygon segments (Ctrl + R) to get the first segment (white circle) to the corresponding position with the exterior facade polygon. This is very important for the alignment of both facades!

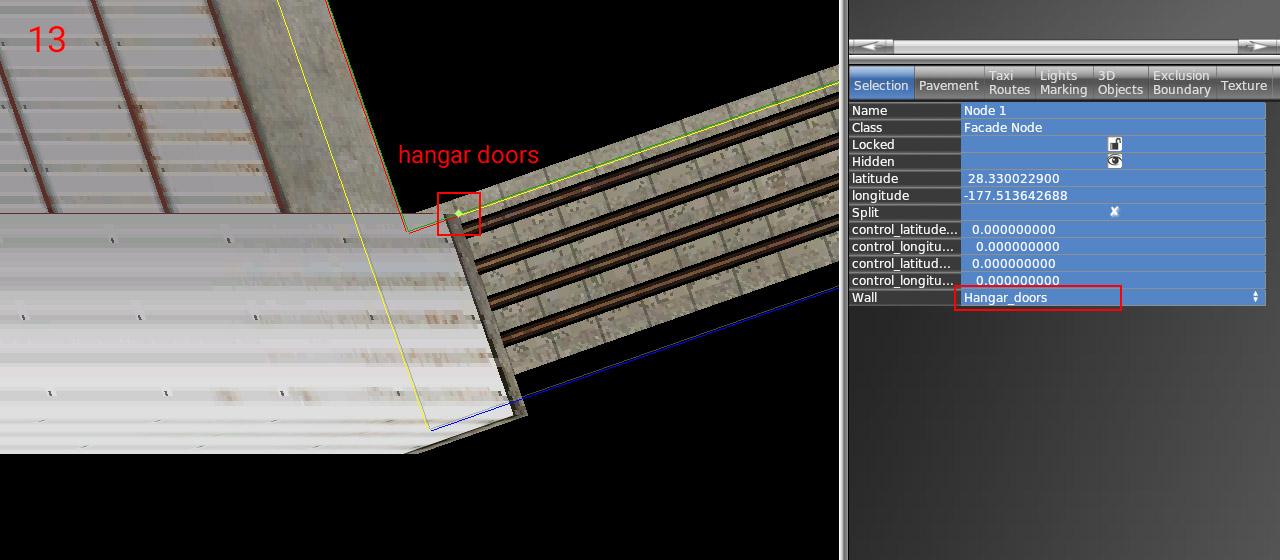
13 – Set the proper wall type to the opening (and other walls eventually). The Interior is done – you can lock the shape.
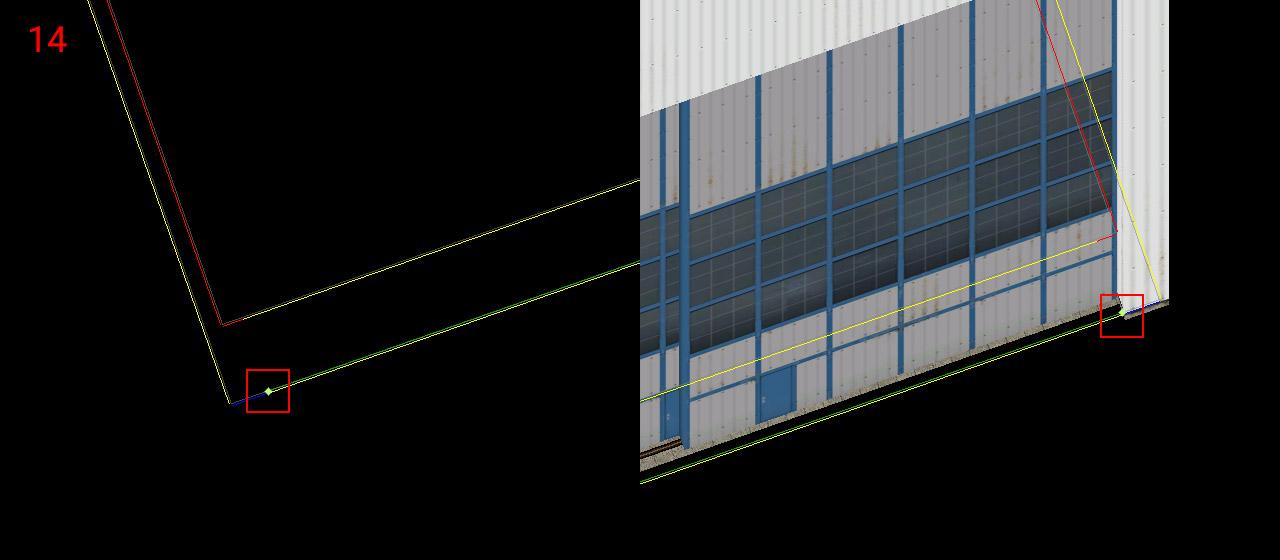
14 – Choose the door facade you want (lib/airport/hangars/flat/parts/hangar_door_xx.fac) and draw a single-segment polygon. Points should be placed exactly on the border of the exterior facade polygon (blue segment). Use the isometric preview to fit both endpoints.
15 – Set the corresponding height of the doors (matching hangar height levels – 8, 10, 12, 16, 18, 22, 26, or 30) and set the wall type to "Hangar_doors_open". You are done!

NOTE: All standalone door facades also have a wall with closed doors (Hangar_doors). This makes no sense in combination with the interior of course. But you can use it for making any combination of the exterior facade design and doors. In that case, you don't need to worry about the interior facade but everything else above is still true.