This tutorial will walk through overlaying a photo onto an aircraft fuselage in Plane Maker. It assumes familiarity with the basic aircraft texturing techniques discussed in the Creating Basic Paint Textures tutorial.
You can download the aircraft file and images used in this tutorial here: A36_photo.zip
Selecting a Photo
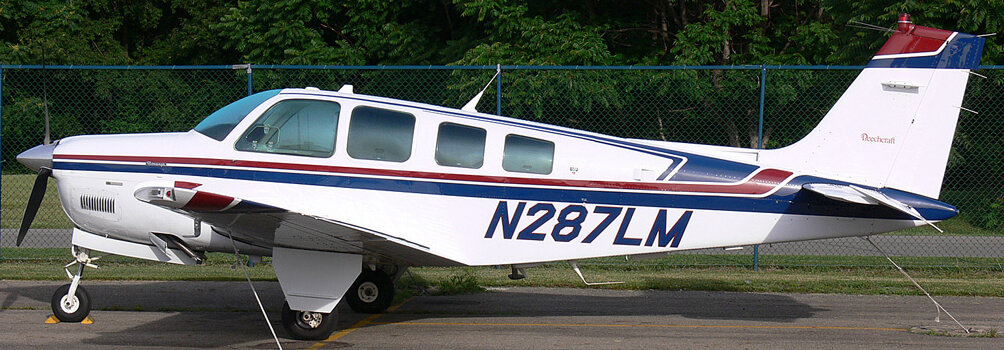
The ideal photo to use as a Plane Maker texture is one taken from a 90 degree side view with even lighting across the whole of the fuselage. Beyond these requirements, be sure sure your use of the photo complies with the terms of its copyright.
For our example Bonanza, we used the photo below, with many thanks to its copyright holder Terry Shepherd:
Getting Started
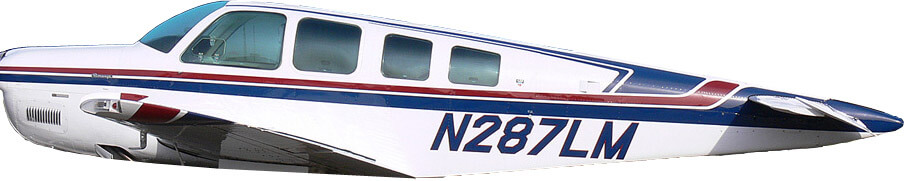
Create a starting point PNG image as in the Creating Basic Paint Textures tutorial. Then, using your image editor, cut away everything from your photo except the fuselage. In Photoshop, you can use the lasso tool to do this. You will inevitably get some of the wings in the photo, but don’t worry about these for now.
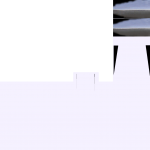
In our case, this fuselage-only image looked like this:
This image was stretched and warped (using the Transform options in Photoshop’s Edit menu) to sit over the starting-point image of the fuselage. Note that it is not uncommon to have a large area on the top and bottom of the fuselage side views that is not covered by your stretched image. This area, like the parts covered by the wings, can be cleaned up later.
Go through the same procedure to texture the wings, stabilizers, engine nacelles, and so on. For each piece that you have a photo, you’ll need to:
- crop a version of the original image to include nothing but that piece,
- paste the image of that piece over its placeholder in the starting-point image, and
- stretch and/or warp the piece to fit the area you defined in Plane Maker.
Do this for both the left and right sides of the aircraft, where necessary.
Using a layered image format like PSD will prove invaluable for making small changes during this process.
Because a top view of our example aircraft’s wings and horizontal stabilizers was not available, our example aircraft will only have it fuselage, vertical stabilizer, and engine housing textured with the photo. For the rest of the wings, we will simply use the same solid white that the body is painted with.
Touching Up the Photo
With a rudimentary version of each piece of the aircraft placed properly, it’s time to clean it up. Note that each time you save your Aircraft name_paint.png file, you can press the T key in Plane Maker to reload the texture.
Unless you have photos of the top and bottom of the aircraft, you will probably want to use Photoshop’s clone stamp tool (or an equivalent) to fill in the top and bottom of your fuselage. Because our example Bonanza has a flat underside, there was a great deal of area that needed this in our photo. Because the aircraft has a very plain, flat white texture for most of its body, this wasn’t a problem.
The clone stamp tool should also be used to get rid of the wings and any other bodies that are attached to the fuselage in the photo but are not actually part of the fuselage.
Finally, in addition to cloning for the top and bottom of the fuselage and removing the wings and other non-fuselage bodies, you’ll need to use your image editor to remove the shadows and other artifacts of uneven lighting across the body (because, of course, the X-Plane simulator will add its own shadows where it needs them.
We’ve highlighted the most prominent trouble areas in green in our photo here:
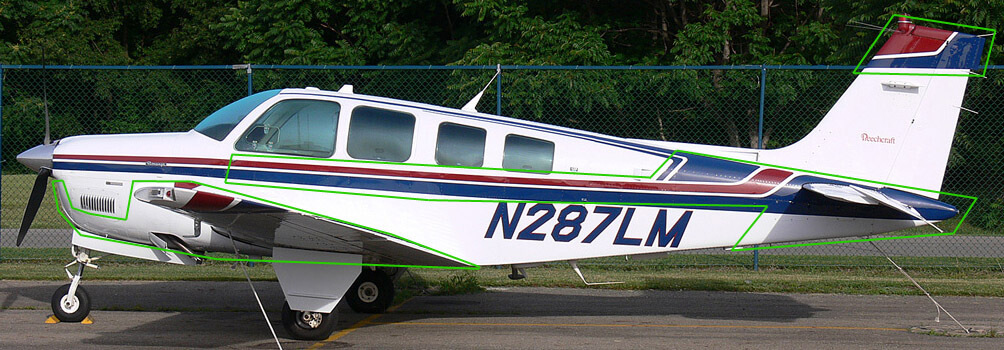
In the areas highlighted, our aircraft texture needed a lot of attention before it would look convincing in X-Plane.
A Note on Windows
If you are creating a 3-D cockpit object in a program like AC3D or Blender, you will want to completely fill in the windows in this overlay image, as the transparent windows in your cockpit object will replace this texture as needed. Since, for the purpose of this tutorial, we are not creating a 3-D cockpit object, we left the windows and made them semi-transparent.
Examining the Finished Product
Our finished images are seen below, and are also included in the completed aircraft ZIP. Our ACF file is A36_photo.acf, so our two image textures are A36_photo_paint.png and A36_photo_paint2.png, respectively.
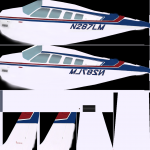
A few things to notice about these images:
- The textures for some pieces overrun the area laid out for them by the Plane Maker-generated starting points, but for small areas, this isn’t a big deal.
- The white area in the middle of the first texture image is used for the gear doors and struts, which were too shadowed in our image to be usable. Instead, the white texture from the body was copied.
- The propeller texture (located in the far left center of the first image) is simply made of a darkened slice of the nacelle texture, which itself is in the second image.
- Since our original image was of the left side of the fuselage, the tail number on the right side had to be reversed.