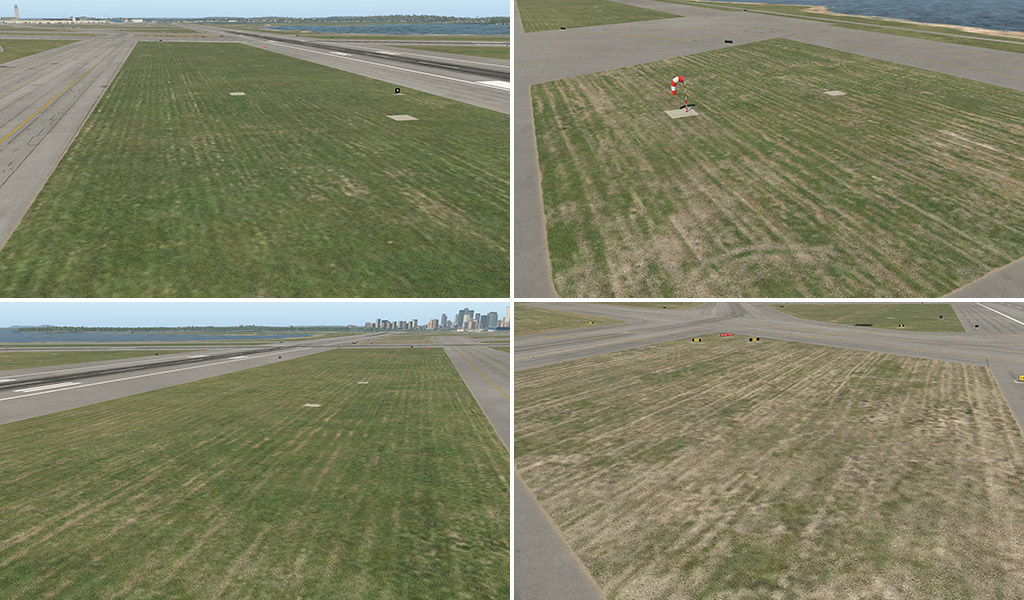
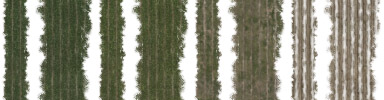
X-Plane 12 has a new set of textures and other art assets. The main idea behind this pack is the general improvement of airports – particularly the depiction of the ground surface. All features in this pack comprise POL, LIN, or simple OBJ assets, and all of them are “ground” oriented. Here is an example of what can be achieved:

The assets in this pack are divided into four categories:
lib/airport/ground/pavement
lib/airport/ground/pavement_FX
lib/airport/ground/terrain
lib/airport/ground/terrain_FX
We can understand these four categories as different groups of layers in the following order:
4 – pavement FX effects placed on, or snapped to paved surfaces (cracks, dirt, grunge, drains, etc.)
3 – pavement main hard surfaces (asphalt, concrete)
2 – terrain FX effects placed on, or snapped to natural surfaces (paths, grass patches, lawn tracks, etc.)
1 – terrain natural terrain (grass, desert, etc.)
A higher value means a higher priority of visibility. In other words, terrain FX won’t be visible through the pavement but the pavement FX over the grass will be shown. That means you can paint a dirt path across the border of asphalt, but you shouldn’t paint asphalt cracks across the border of grass.
1 – Terrain
We have brand new textures and shaders for all basic airport terrains. The grass is completely new, the desert is new, and so on.
In addition, we have unique grass textures with lawn-mower tracks. This is a typical detail that can make the terrain look more realistic. These textures are directional so for better plausibility, it is very important to set the proper direction in WED polygons.
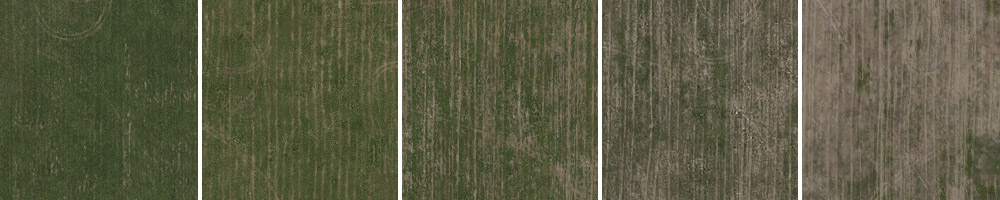
Next, we have textures for sand and soil. It can be useful for various patches in the grass.
2 – Terrain_FX
This is a group of effects that can be placed on top of natural terrain.
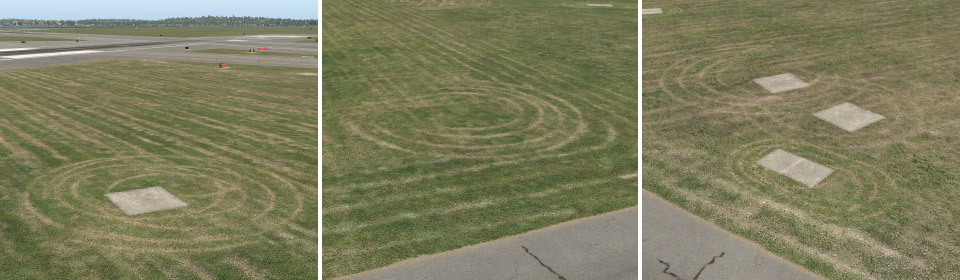
lawn_tracks
The lawn-mower tracks effect comes in different forms. POL (polygon) files have a similar visual effect to those above. This time, however, they are transparent and contain only the lawnmower tracks themselves. It can be placed on top of any type of underlying terrain (which can be handy for locations where nice green grass is not desired).
LIN (line or stripe) files are useful as a natural border between grass with a lawn-mower effect and surrounding areas. Typically these can form the natural shape of grass islands in between taxiways. We have various strips with corresponding colors of grass.
Typical use:
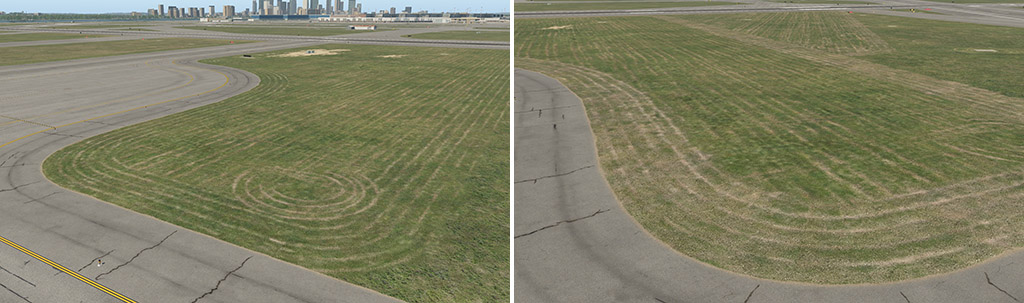
OBJ (object) files are mostly spots with a couple of tracks in circular form. These can be placed typically in corners, or under various things in the middle of the grass (like taxi signs).
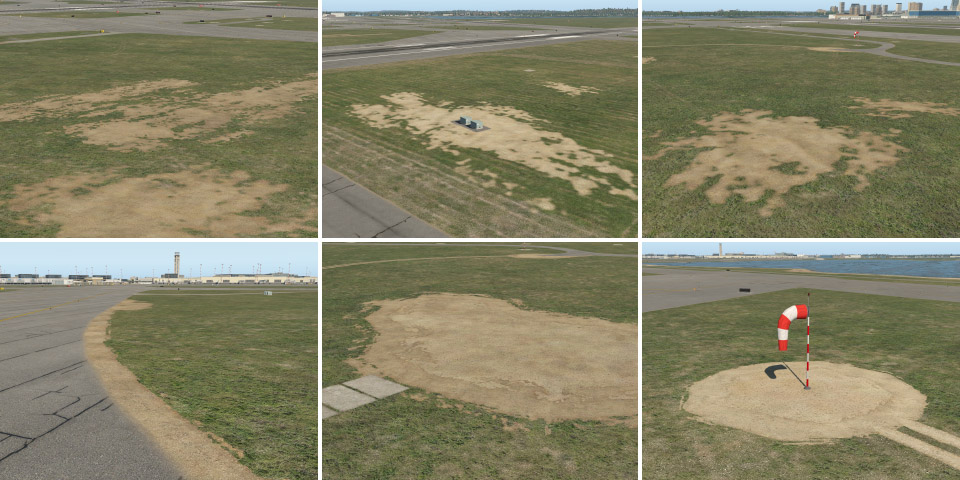
patches
Patches are available as single OBJ (various sizes and shapes) and as LIN (various widths). We also have all corresponding colors for basic terrain polygons – grass, dark grass, dry grass, light and dark sand, and soil. They’re useful for modeling various imperfections in basic terrain, spots, broken lawns, and so on. Also, these can be used along the edge of a taxiway, as an extension of the natural edges (see below).
paths
Path LIN are available in various widths and materials (concrete, sand, and soil).
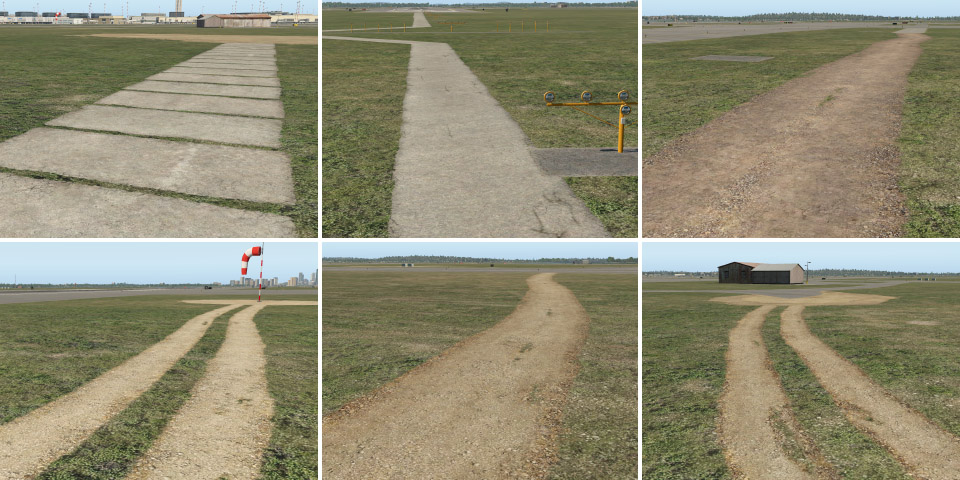
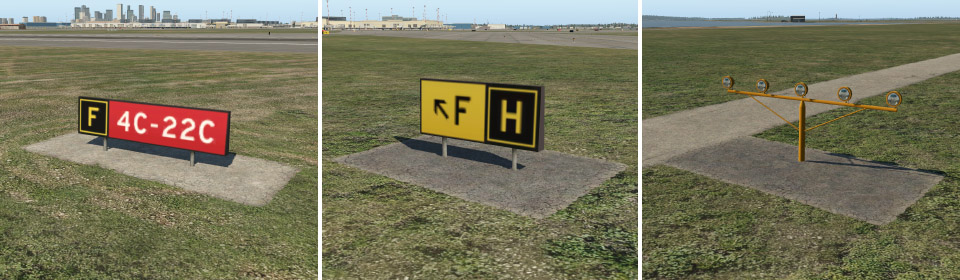
taxi_sign_base
These are paved bases for taxiway signs. Single OBJ are available in various sizes, and two colors (light and dark). If you can’t find the desired size for a certain situation, you can also use the LIN variant. These OBJ have an exception to the layer system described above. They render above the pavement so you can use them also on top of taxiways.
3 – Pavement
In X-Plane 12 we also have a brand new shader designed particularly for hard airport surfaces. Generally speaking, it can make better-looking asphalt and concrete, with less obvious texture repetitions over large areas (almost invisible repetitions).

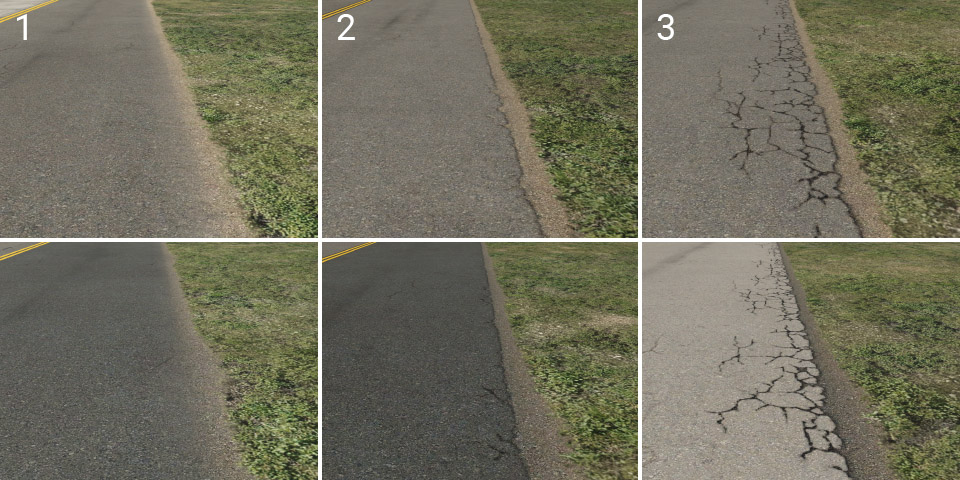
asphalt_
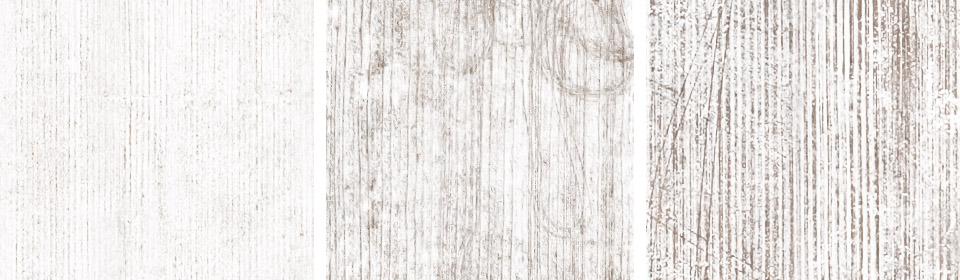
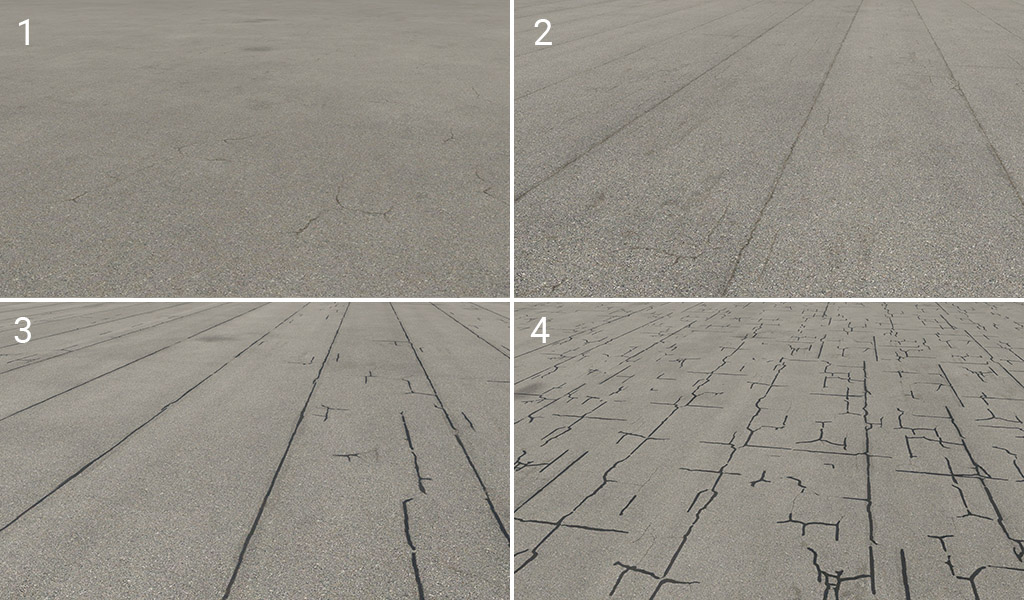
Asphalt surfaces are available in five basic colors (light to dark).
Each color variant is available with four different effects:
1 – plain: this variant is omnidirectional. It is useful for specific situations (typically taxiway shoulders) in conjunction with various effects (see below).
2 – strips: this is probably the most common variant with typically visible strips.
3 – worn: same as (2), but a bit worn. Gaps between strips are sometimes cracked or patched.
4 – patched: highly worn, irregular, and more visible cracks.
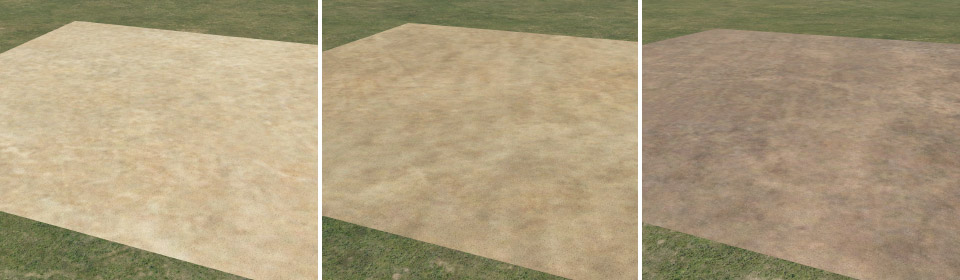
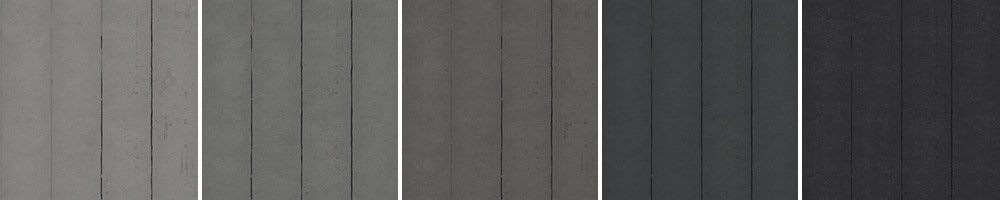
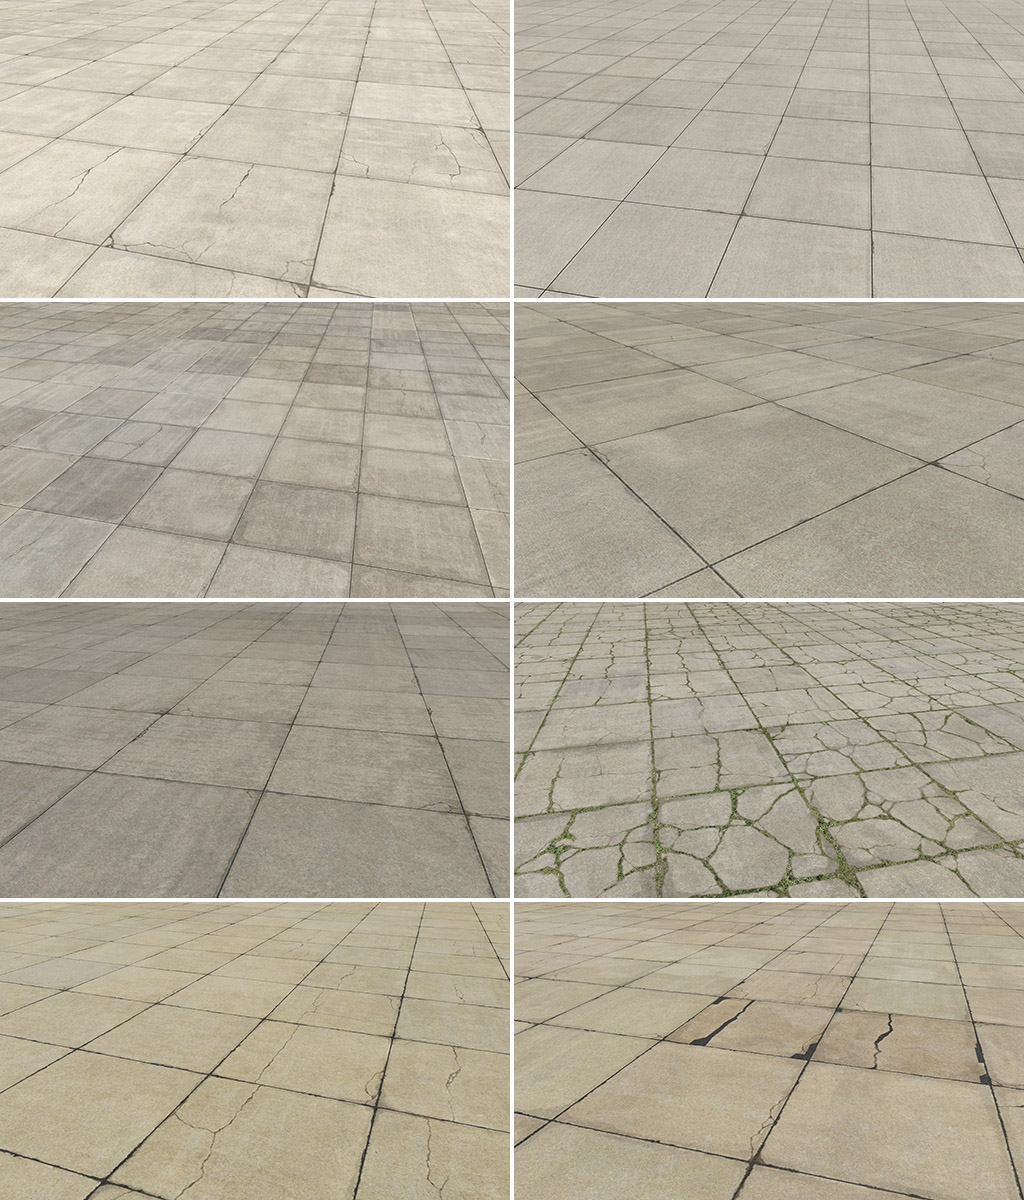
concrete_
Concrete doesn’t have a unified system like asphalt. We have three main colors (gray, light gray, and dark gray) but with slightly different effects for each of them. In addition, we also have the fourth color group which is tinted (red or yellowish). Here are some samples of the variants:
4 – Pavement_FX
This is a group of effects that can be placed on top of hard surfaces.
edges
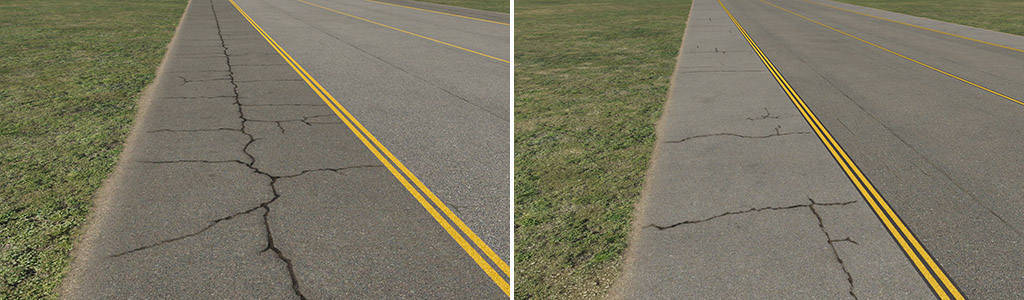
Probably the most important asset. Edges are dividers of pavement and natural surrounding terrain. They are available in two colors (light and dark) and have three variants:
1 – soft: basic edge with a slight plastic effect. Suitable for most common situations, particularly for grass.
2 – elevated: pavement surface looks slightly elevated, and the edge is a little worn.
3 – cracked: a lot more cracked and worn.
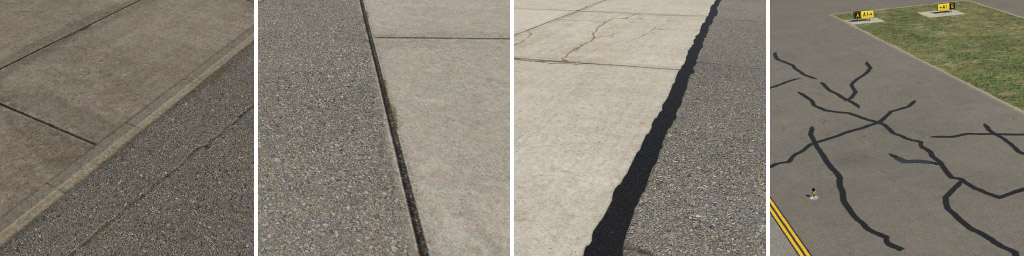
gaps
These are dividers of adjacent asphalt or concrete surfaces. A wide patch line can be used for manually painted large-scale cracks, however we recommend you do not repeat this small texture to cover large areas.
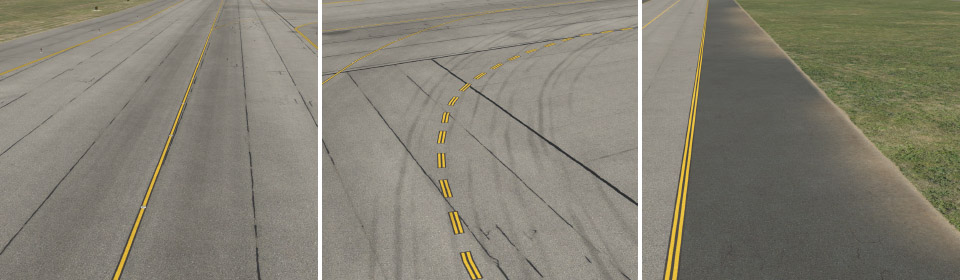
taxiway
Here we have four different types of taxiway structures. Imagine transparent strips, with the very subtle effect of dirt on asphalt. These were designed to be used in conjunction with the plain variant of asphalt. These are useful for curved segments of taxiways and particularly shoulders, and are available in different widths, which should roughly match the usual sizes of shoulders.
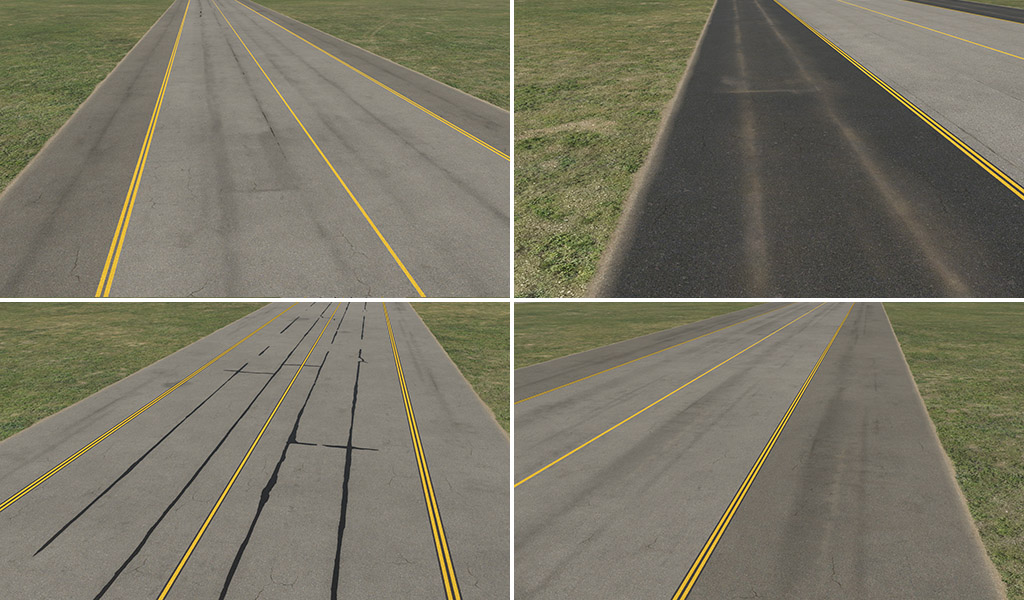
taxiway_cracks
Another kind of effect that is useful, especially for shoulders. Also available in different widths.
taxiway_dirt
In this group, you can find subtle dirt effects. Some are designed for placement along the centerline, others are for the edge of the taxiway.
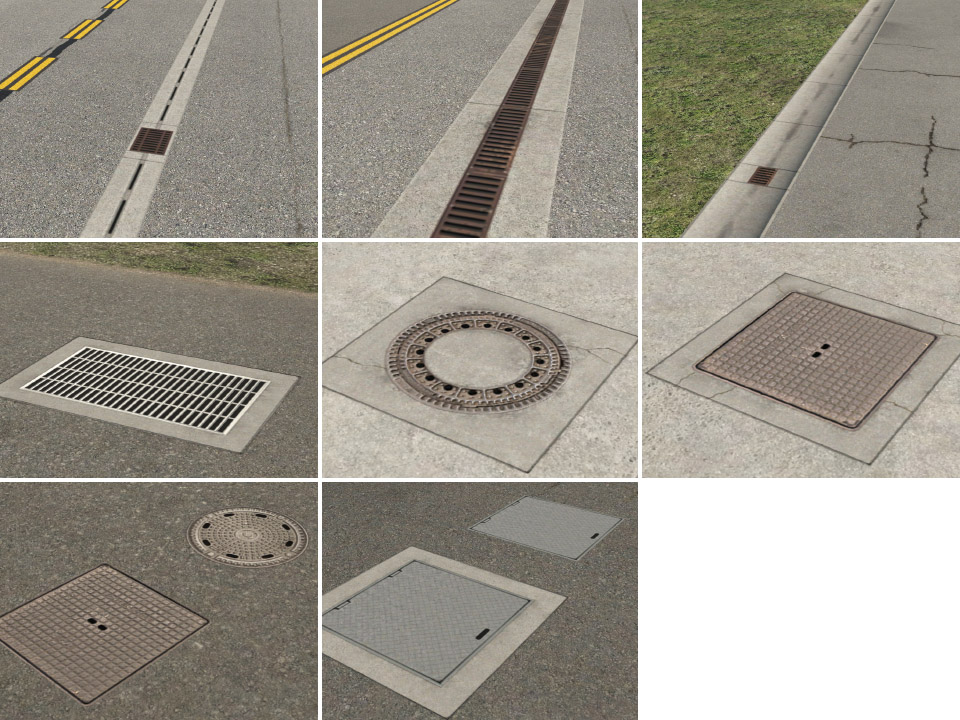
drains
Various drains and manhole cover lids.
General hint: most LIN effects have end caps. That means the line needs some minimum length. Any time you see an artifact (black rectangles), it is probably due to insufficient length of the line.
Hi! Can you tell me how to create a weather texture to cover? Which editor can I use?