X-Plane 12 features a 3-D HUD – besides drawing HUD markings on top of the 3-d scene, the HUD aligns to the world in 3-d with the same parallax error that a real HUD would have, and looks “far away” to a user in VR.
The HUD consists of three separate authoring elements:
- An area of the aircraft’s 3-d panel texture that has HUD markings.
- A 3-d mesh in an aircraft attached object with appropriate objects, that will serve as the HUD glass. The HUD image will only appear when the glass covers the screen space area in front of where the pilot “perceives” the HUD to be.
- Plane-Maker settings to calibrate the 3-d HUD’s alignment.
Setting Up the HUD in Plane-Maker
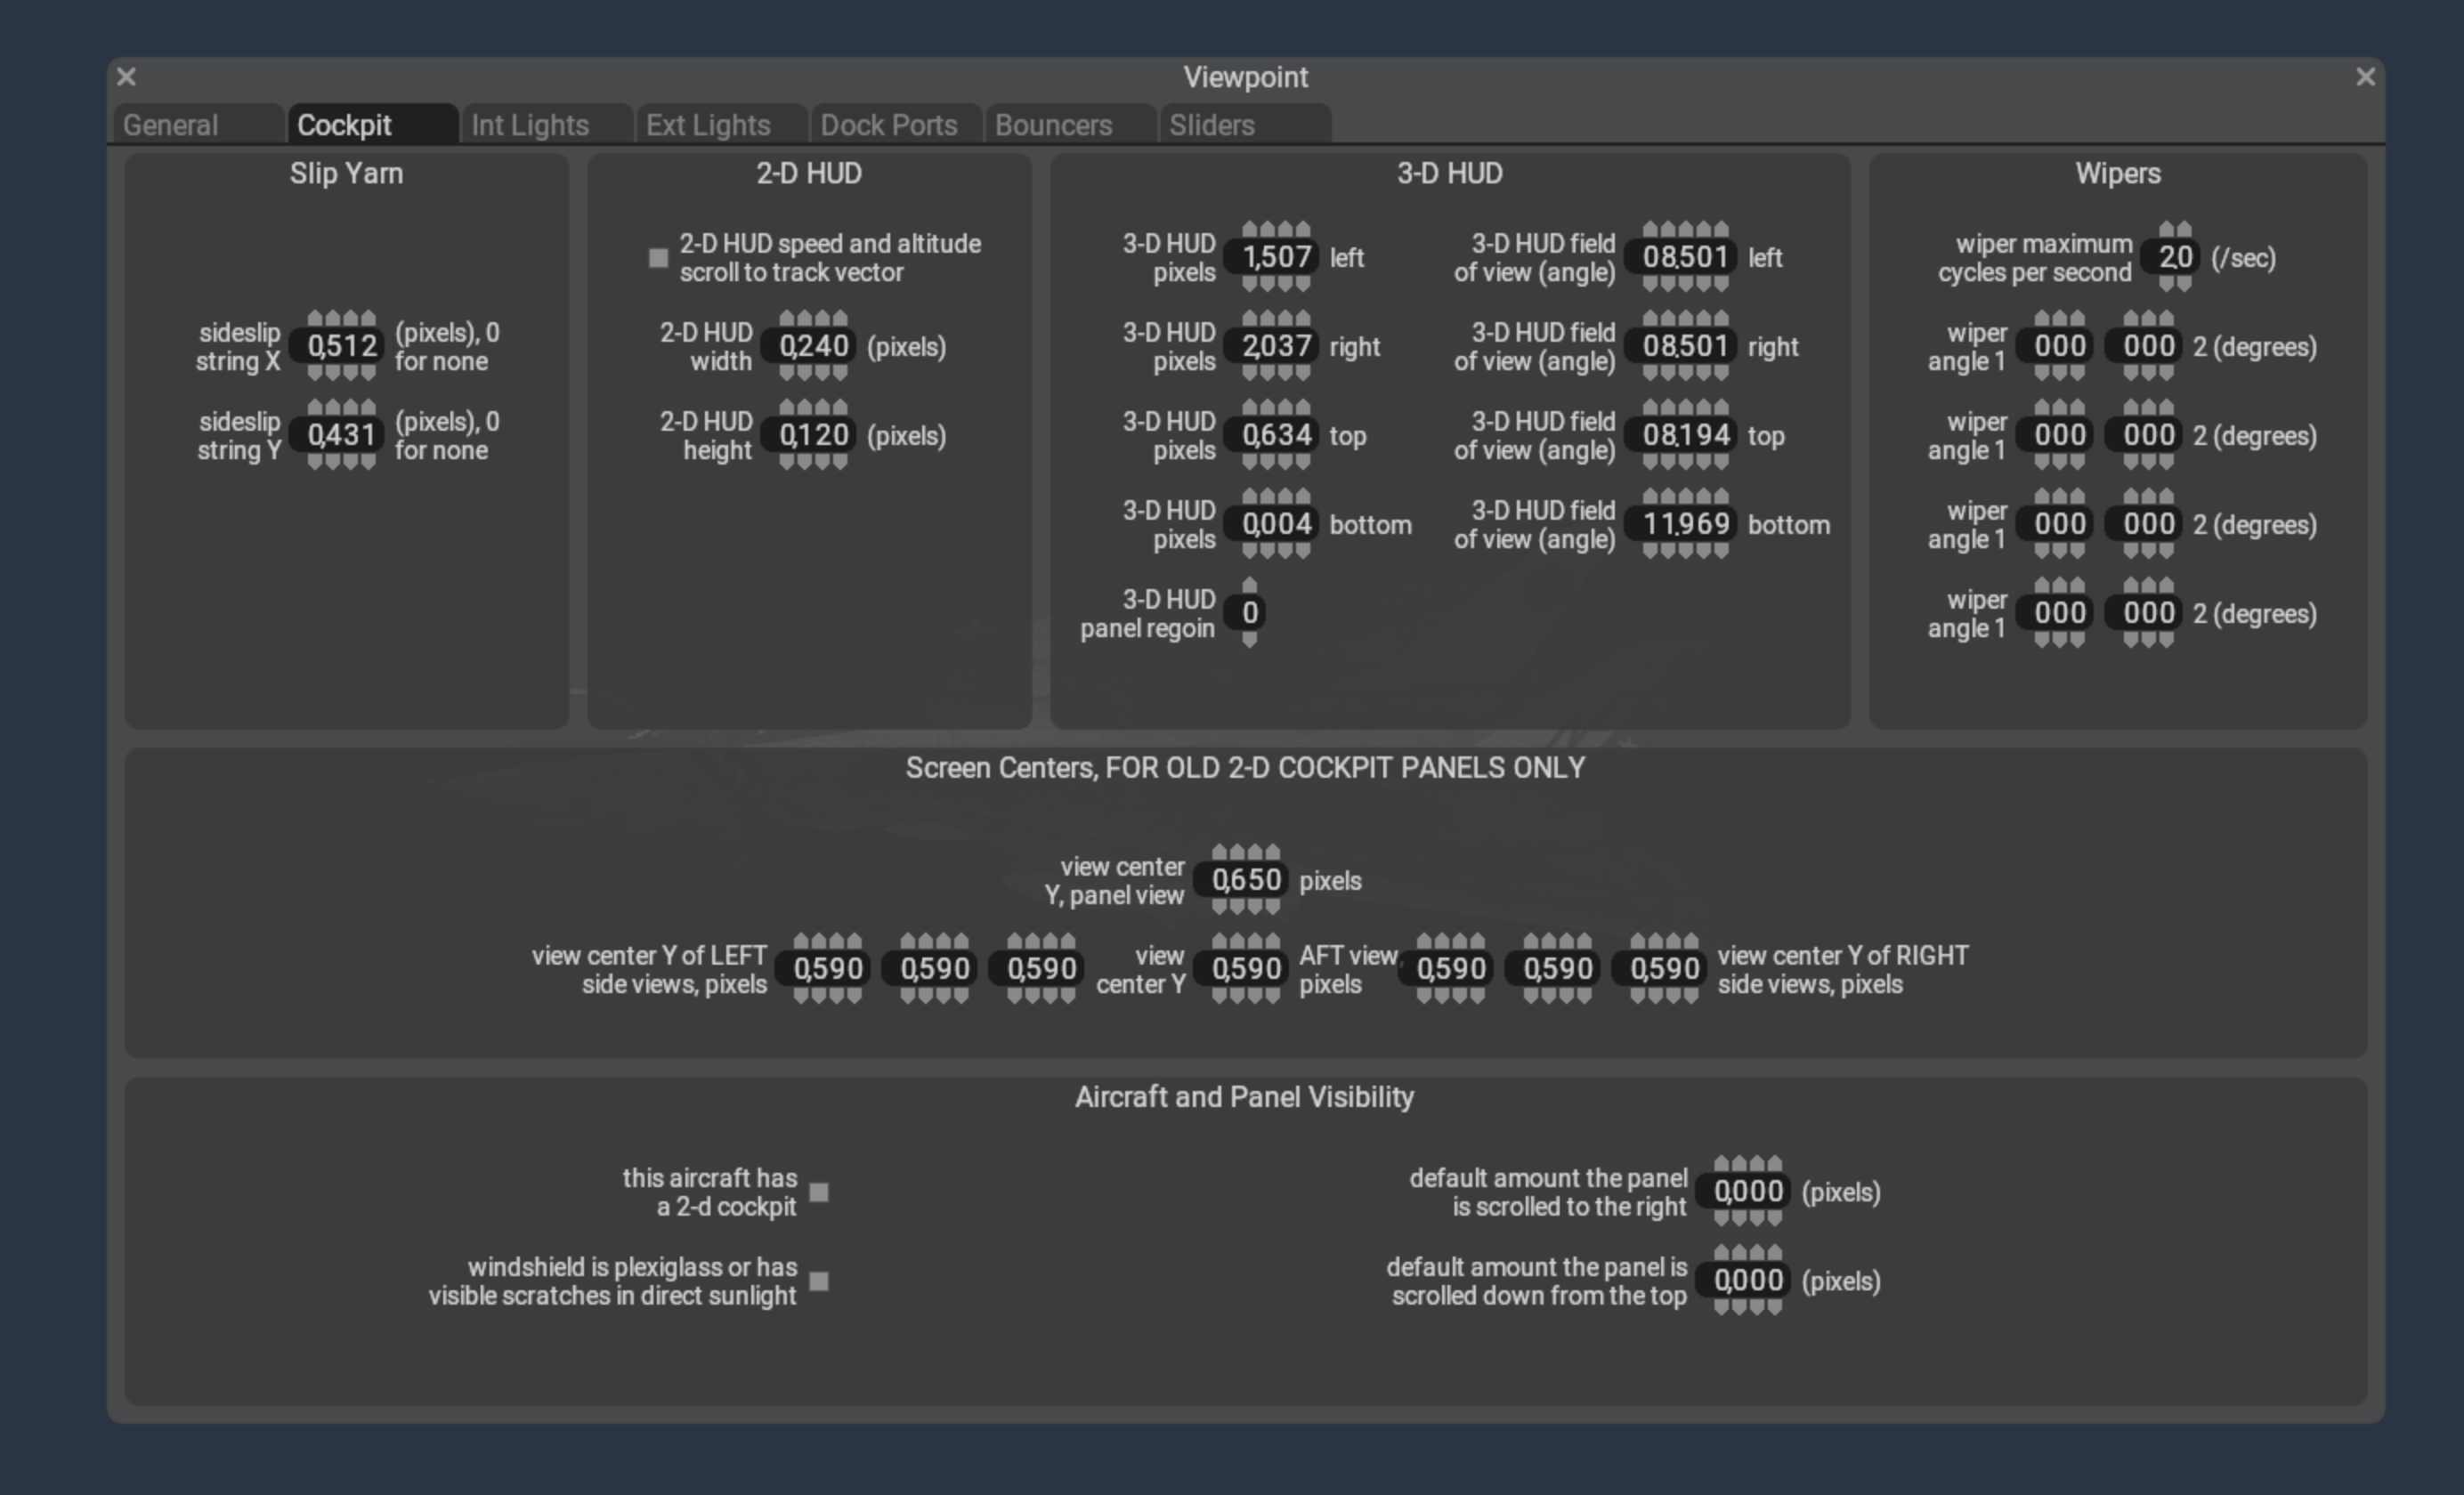
Plane-Maker’s viewpoint cockpit screen contains a section “3-D HUD” that requires three types of information:
- The field of view angles of the edge of the HUD glass. You may need to calculate these in your 3-d model – it is the number of degrees to the left, right, up and down from from the pilot looking straight ahead at the default pilot viewpoint.
- The pixel position on the 3-d texture panel that the HUD image will be taken from. The lower left is 0,0, and the unit is pixels. You will be able to see this rectangle in the panel editor to validate that it is correctly set up, but it must be changed in the viewpoint cockpit screen.
- The panel region. If your 3-d cockpit uses panel regions, pick the region number for the HUD here. If your aircraft does not use panel regions, you should leave this as the default “0” value.
Creating the HUD Graphics
In the 3-d panel editor, click the HUD icon in the upper right button bar (just to the left of the “2-D” icon) to view the HUD preview lines. If the panel is set up with a 3-d HUD, you will see:
- A cyan box showing the edge of the HUD’s image and
- A HUD ladder showing the horizontal center, horizon, and 2.5 degree vertical increments.
You can use these queue marks to calibrate your HUD graphics.
⚠️ WARNING: as of X-Plane 12.0.8 the “2-d” HUD instruments only work in the 2-d HUD, and the “3-d” HUD instruments only work in the 3-d HUD. We recommend using generic instruments for the 3-d HUD.
Setting Up the 3-d HUD Object
The 3-d HUD needs a glass element in an object, with a special attribute
    ATTR_hud_glass
    TRIS	36 18
    TRIS	54 18
  ATTR_hud_reset
Steps to Debug The HUD
First, confirm the HUD image is present by using the texture browser to view the night panel texture.
Second, confirm the HUD glass is present by temporarily removing the HUD glass attributes and giving it a debug color texture.