First a disclaimer: DO NOT SHAKE YOUR LAPTOP!!! If you shake or thrash your laptop and kill yor hard drive, do not blame me. Laptops are delicate complex electronic devices and should not be jostled, beaten, dropped, abused, or tossed around.
Okay with that out of the way, a stupid plugin trick. This is only for Mac users with a MacBook, MacBook Pro, or possibly some of the newer G4 laptops (although I haven’t tested on these).
First, download “SMSHack.xpl“. Unzip it and drag the .xpl file into your plugins folder.
Start X-Plane. In an external view, rotate your laptop about 45 degrees to the left and right and 45 degrees up and back. this calibrates “SMSHack” to know the orientation of your computer. You must do this calibration every time you use SMSHack.
Then: fly using your laptop like a yoke. Roll your laptop to roll the plane, and pitch the laptop to climb and descend. Disable the plugin to get normal joystick control back.
How it works: I use a library called Unimotion. (Hrm..it’s LGPL…well, source is here then.) Unimotion reads the SMS (sudden motion sensors) on modern Mac laptops. These are three accelerometers that the Macintosh can use to detect it has been dropped; the operating system will try to park the hard drive heads to prevent a disk failure on impact.
Because gravity is a constant acceleration on the laptop, the accelerometers can be used to detemrine the roll and pitch of the laptop. This plugin simply shovels the relative accelerations into the joystick deflections.
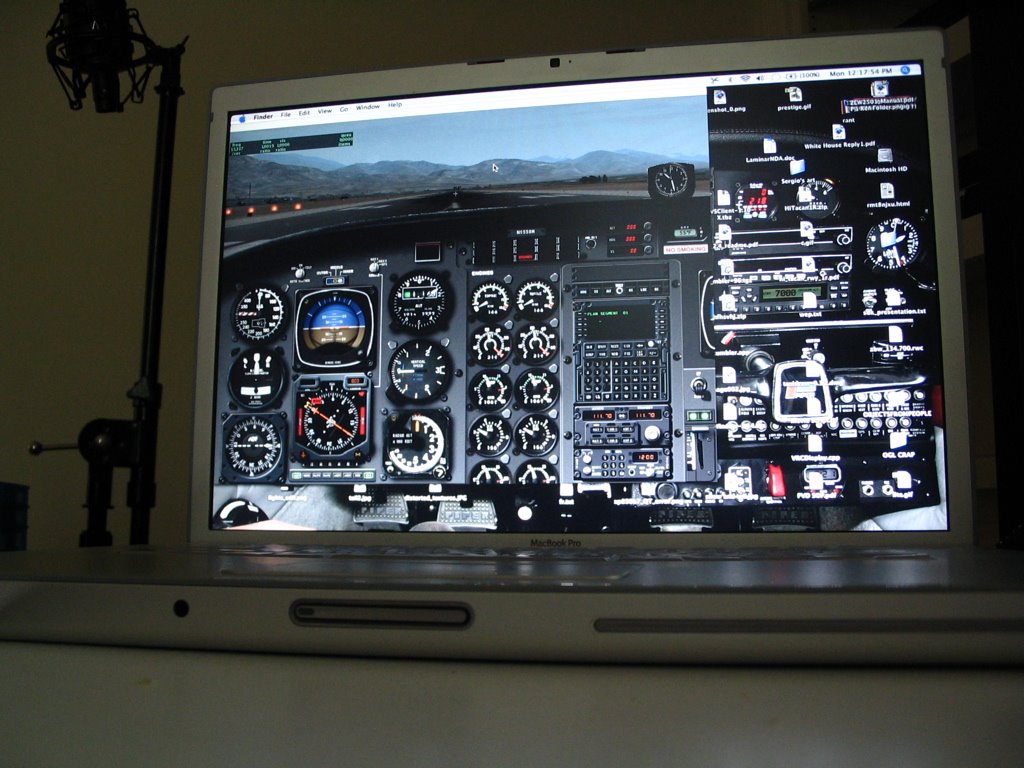
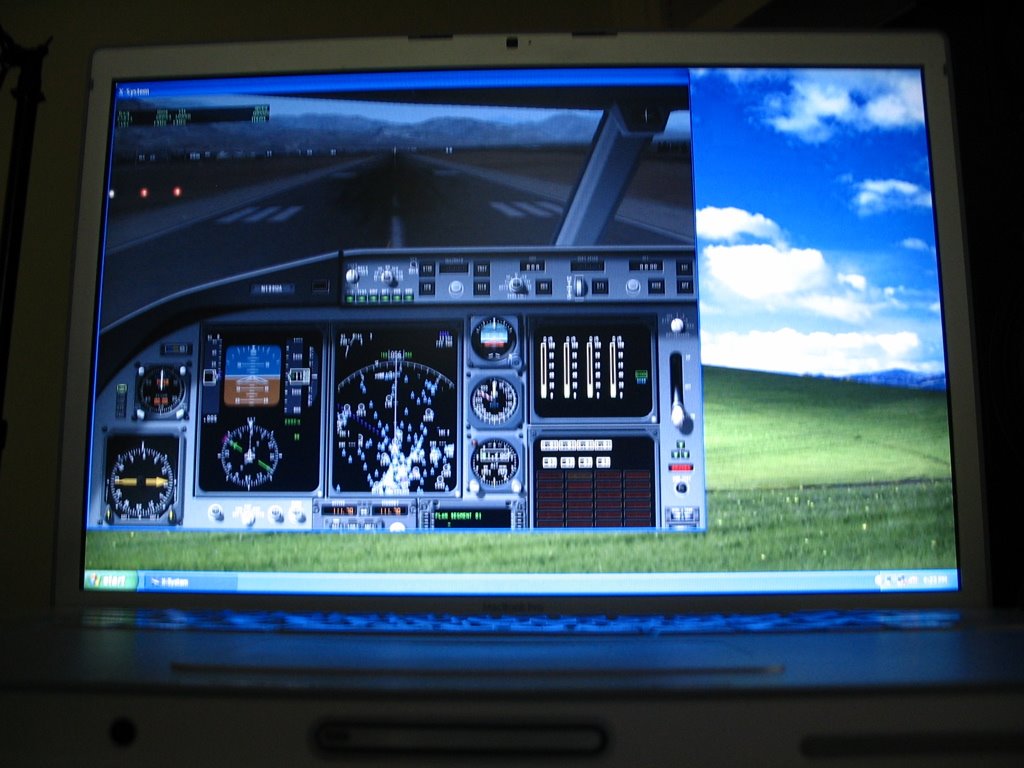
In a vain and foolish attempt to prove that I am the uber-nerd, I have configured my MacBook Pro to boot Mac OS X 10.4, Windows XP Home SP2, and Ubuntu Linux 6.06. It took a while to get everything set up, but all three now run X-Plane with hardware acceleration.
This provides a unique chance to compare the performance of the sim varying old operating-system factors (the OS, the drivers, and the compiler). The machine is a 2.16 ghz DuCore MacBook Pro with 2 GB of RAM and a 256 MB ATI X1600 card.
So without further delay, here are the numbers. Speed is in fps for frame-rate tests 1-3 (1 is lowest settings, 3 is very very aggressive). Each set of fps is for panel view, forward-no-HUD view, and the same view paused. Load times are in seconds for the KSBD demo DSF. The second load time is to reload the same scenery – the times are much faster on all 3 OSes because of the disk cache.
Drivers are not tweaked; this is simply the ATI binary drivers for Linux, whatever Apple ships in BootCamp (some 2.0 series ATI drivers) for Windows, and the 10.4.8 drivers for Mac, none tweaked in any way at the OS/control panel level. For Linux I disabled VBOs because they cause graphic corruption in some cases and slow frame-rate. This is probably a Linux/ATI driver bug.
PLATFORM      Mac         WIN        LINUX
Load/Reload   2.77/1.31   5.02/1.33  3.05/1.04
FPS Test 1    65/71/80    64/69/88   56/62/62
FPS Test 2    49/55/54    50/56/56   34/37/37
FPS Test 3    15/15/15    16/16/16   4/4/4
Analysis:
The Mac has the fastest disk performance; both Mac and Linux are significantly faster than Windows in raw loading. For reloading a file all operating systems are about the same, but it’s the load-without-cache case that counts.
Windows has the highest frame-rates; slightly faster than Mac but quite a bit more than Linux. The lack of safe VBOs on Linux could account for this.
In the case where the fps didn’t rise when the sim was paused, the limitation is with the video card – not surprising for tests 2 and 3 where there’s a lot of antialiasing, anisotropic filtering, and objects.
Tomorrow I’ll blog about how the fps test itself can be used.
Normally you just double-click X-Plane to launch the sim. But X-Plane 850 has some hidden command-line options. We provide these for in-field debugging; if you hit a problem such as a bad video driver you can trigger special options within the sim that aren’t exposed in the settings dialog boxes.
Macintosh Users:
To run X-Plane using command-line arguments, you must launch X-Plane using terminal.
Open the utility “Terminal”; it can be found in the Utilities folder (within the Applications folder). Terminal gives you a command-prompt.
Drag your X-Plane application into the terminal window. The command line will list the names of all of the folders leading to your copy of X-Plane using / for directories. All spaces will be preceded by \ characters.
Delete the extra space at the end and add the following to the command-line:
Contents/MacOS/X-Plane
After the word X-Plane you can include command-line options.
This would launch X-Plane 850 RC-3 (in the X-Plane 850 folder of my hard drive “GIS”) using the –no_sprites option.
Windows Users:
To Lauch X-Plane from a DOS prompt you will have to…
Pick “Run…” from the Start menu. Type cmd (3 letters) for the name of the program and press return. This will open up a DOS prompt.
Type cd and a space and then drag your X-Plane folder into the DOS prompt window (the full path of the file will be typed). Press return. This will move your command prompt to the X-Plane directory.
Drag the X-Plane application into the DOS prompt window. You will see its full name in quotes including the hard disk and directories separated by back-slashes.
You can then add any additional command-line options.
An example from Windows:
"X-Plane 850 RC-3.exe" --fps_test=1
(It is necessary to change directories on Windows to make sure that Log.txt and other files are put in the right place. On Mac these files always end up in the X-System directory.)
Linux Users:
X-Plane can be launched like any other command-line tool; you may need to prefix it with ./ if you don’t have the current working directory in your search paths. For example:
cd /home/bsupnik/X-Plane\ 8.50\ RC-3/
LD_PRELOAD=/usr/lib/libalut.so ./X-Plane-i586 --fps_test=1 --require_fps=20
On my distribution (Ubuntu with GNOME, stop your snickering!) it is not possible to simply drag the application into a terminal because the spaces in the file paths will not be properly escaped.
Command Line Options
Generally X-Plane command line options have full names and two dashes. Some require parameters, as in =1. Order does not matter and you can use as many options as you want. Some examples (simplifying the application name, which varies by version and OS):
I’ve always thought we should come up with cool marketing names for new code in the sim. Look at ATI and nVidia. When they reduce the amount of VRAM on their cards and steal your system memory, they don’t call it “hey, we’re cheap bastards so we left off some chips and hijacked yours instead”. Instead they call it “TurboCache™” (nVidia) or “HyperMemory™” (ATI). Don’t those sound much better?
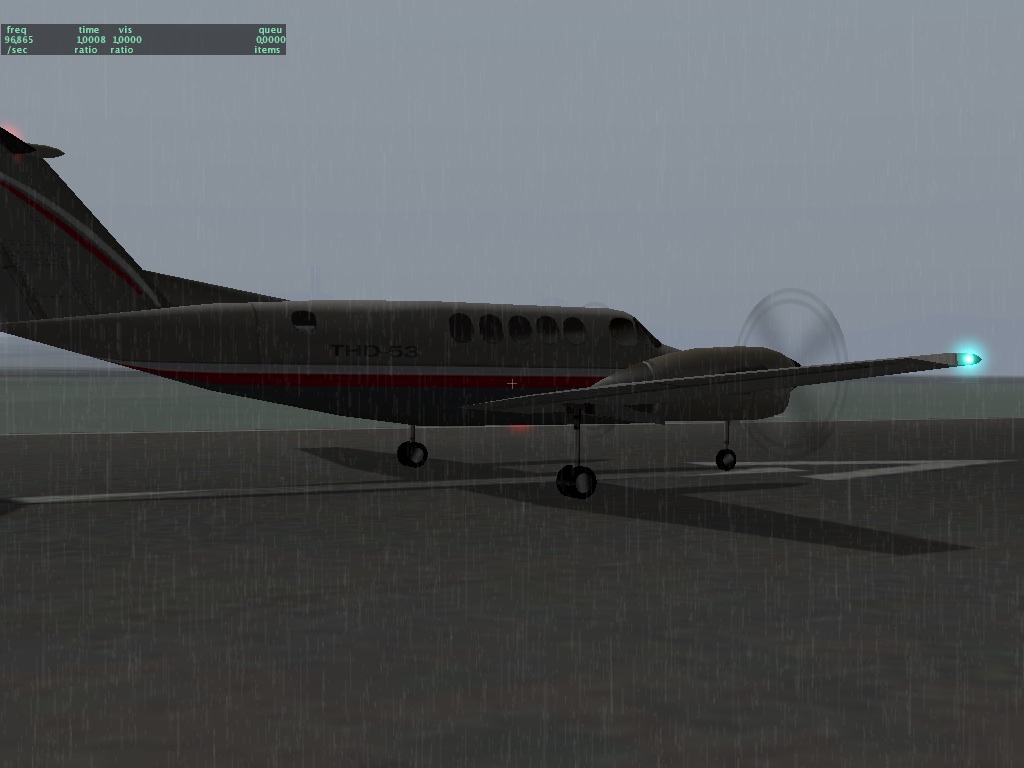
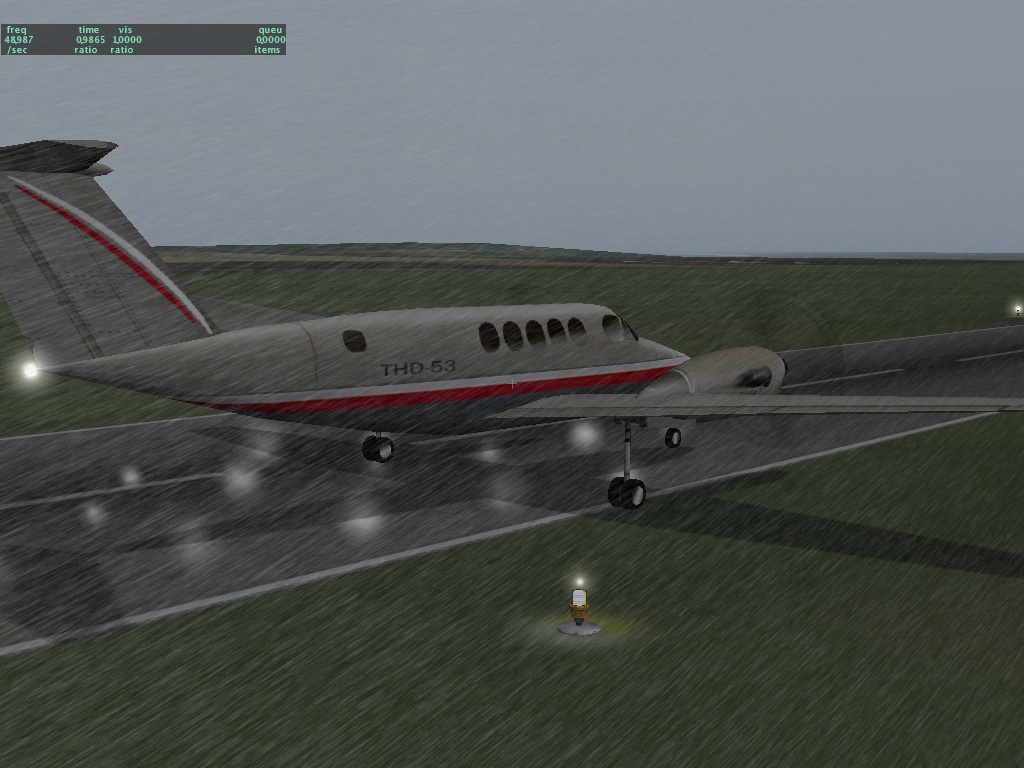
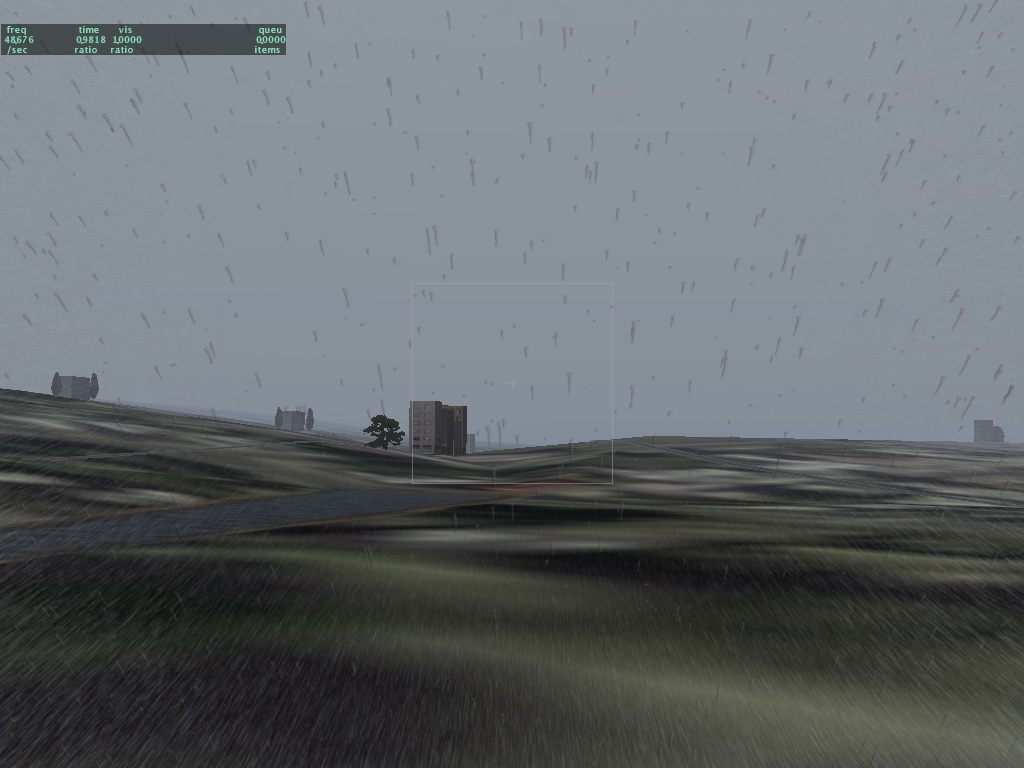
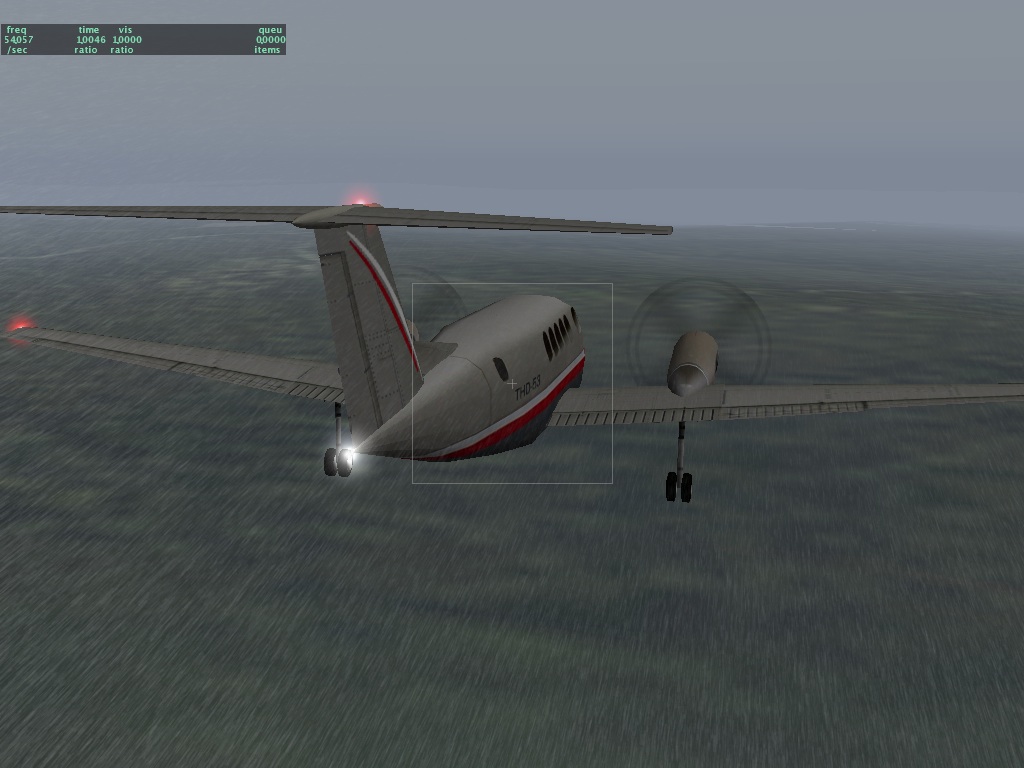
Perhaps we can call the new rain effect (due out in the next RC) “MegaRain XT” or, um, “HyperSpash GT” or “Virtual Droplet Technology (VDT)”? I don’t think I’m cut out for a career in product marketing. Anyway, here are a few screenshots:
There will probably still be some camera angles where the rain looks weird; it’s a compromise between image fidelity and framerate.
Apropos of nothing: Ami sent me this flash video. I must warn you…Chris described it as “the corniest flash I’ve ever seen”….and in the world of flash that truly says a lot. Think of it as the blue pill for your, um…bits. Anyone wanna make a flash video showing the virtues of MegaMoister 2.0? 😉
(I promise the next blog entry will contain more information and less attitude!)
This blog entry describes how to file a performance bug for X-Plane. You don’t have to participate in X-Plane betas, so if this procedure seems scary or too complex, I suggest simply waiting for the final sim release. But if you want to help, this procedure explains how to do it. It is not enough to just tell us “the framerate is bad now” – we will just ask for the information that this post explains how to provide.
First, to file a performance bug, you will need two clean copies of X-Plane: the current beta and the previous final release. Use the web-based installers to install clean copies of both of them. (Hint: you can download the current final release, then copy the folder and run the beta installer on the copy to save download time.) We always need a relative comparison of framerate between two versions to isolate how efficient the sim is from how fast your hardware is. If the sim is slow on your computer and has always been that way, that’s not really a problem with the sim. But if the sim used to be blazingly fast and now it is not, we can fix that.
In order to get a clean test we need to control every aspect of the simulator. Fortunately these clean installs have default preferences. But you will need to go through and make sure you have:
The same weather settings!
The same rendering settings. Make sure new features are off, e.g. if you are comparing 840 and 850, disable birds in 850.
The same aircraft.
The same number of AI aircraft.
The same location.
The camera facing in the exact same position and direction!
The same view mode (e.g. forward, forward with panel, etc.).
For your framerate test you will basically run the sim in a fixed configuration and take some screenshots.
It is very important that the camera angle be fixed. Use the “takeoff” menu item to place the plane on a runway. Do not taxi the plane into position; even the slightest change in the positioning of the camera can have a large impact on framerate, so if there can be human error in moving the camera, then the comparison is not valid. By pre-placing the plane you can get the same camera angle every time.
Some important notes on screenshots:
Control-period will take a screenshot in any screen, so you can take a screenshot of your weather settings, not just the sim screen. Always use control-period, not the built-in OS screenshot mechanism.
Please send us the original PNG files in a big zip file; please do not crop, editor or compress them!
Please do not run the sim at larger than 1024×1024 as the screenshots will be clipped.
For both 850 and 840 we will need three screenshots (so for each performance report we will need six screenshots):
A screenshot of the sim running. Use the data outputs screen to view frame rate, plane latitude, longitude and altitude, and camera location on-screen, so that these are captured in the screenshot.
A screenshot of your rendering settings.
A screenshot of your weather settings.
These last two allow us to exactly copy what you have configured. Please do not use “real weather” when you do these tests.
For each performance report, please send us the six screenshots, the log.txt after quitting both versions of the sim (so two log.txt files) and please tell us in the email the framerates of each sim both when paused and unpaused. (Take the screenshot when unpaused.) So there will be four fps numbers to report for every given test.
Note that these clean installs will not have any third party add-ons; if your performance problem is only visible with a third party add-on, please:
First do the performance test without them and file that pair of datapoints.
Then install the add-on on both and make as few configuration changes as possible and then file that data too.
So for a third party bug there might be eight fps to report – all combinations of: old and new, paused and unpaused, clean and with the add-on.
I just fixed a bug in the mesh crack-patching code. This is a tricky subject, so here’s some information before you file bugs:
Two separate scenery tiles (whether DSF or ENV) may not line up perfectly when placed edge-to-edge. The most common reason is because their elevation data can come from different data sources, but in a few cases files from the same render can have alignment problems.
(In the case of the global scenery, if we have special circumstances like water or airports that must be flat and the features span a tile boundary, the flattening may not work the same way in both tiles. The scenery is also rendered on blocks on different computers, and the blocks may not tile perfectly.)
Whether the error is due to a bug or just two scenery packs together, the sim tries to do its best to fix any gaps in the terrain mesh. (The sim does not try to fix different textures that touch; this is beyond the sim’s capabilities of analysis.) X-Plane will take whichever file is loaded most recently and try to realign its edges to match the old edge. When this works right, you can’t see a seam. More importantly, if an airport spans that border, you can drive over the border (on a runway) without the plane hitting a bump.
I just fixed a bug in the crack-patching code where it would sometimes incorrectly fix a patch. So if you see a ‘crack’ in the terrain (basically you would see the sky color showing between terrain triangles as a sliver of light blue or grey) please report it as a bug, but be sure to include the following information:
Please include a log.txt file so we can see what you have installed. Be sure to quit x-plane before emailing the log.txt file.
Please include a screenshot of the crack. Turn on the framerate, plane lat/lon and camera position datarefs.
Please set your sim resolution to 1024×1024 or smaller and send the original PNGs. Please do not crop, process, or compress them. Please do not send JPEGs.
Please tell us the nearest ICAO airport so that we can easily go to this location.
Some crack bugs may be due to a scenery defect (to be addressed the next time we make new scenery), some may be due to sim bugs, and some may be due to the combination of two scenery packages next to each other.
EDIT FROM 2/19/07: this article mentions some bugs with light visibility from X-Plane 850 betas. These bugs were fixed, and the mechanism of detachment is entirely internal to X-Plane. So please bear in mind when reading this that while this describes the internal engine of X-Plane, you as an author don’t need to DO anything special for lights.
One user reported that the taxiway lights are visible a very long way away from the airport. This is true, but it is probably not a cause for concern. By comparison, the airport beacon has a way of disappearing – hopefully less so in beta 11. Here’s what’s going on:
(When I say “light” in this blog post, I mean the little ball of color that is supposed to simulate the look of a light bulb. “Fixture” refers to the 3-d object modeling the real-world device that holds that bulb in place. The actual rays of light cast are not simulated – that’s why the approach lights don’t illuminate part of the plane no matter where you fly. Current graphics hardware just doesn’t give us that ability yet.)
In X-Plane 850 all “lights” are made via OBJ8 objects. The OBJ8 object may contain both 3-d geomemtry that forms the fixture, and one or more “lights”, created via either the LIGHT_NAMED or LIGHT_CUSTOM command. Objects may also have multiple versions based on LOD. If you don’t use ATTR_LOD, a single LOD range is assigned by X-Plane based on how big your object is. (Bigger objects will need to be visible farther away.)
Now here’s where it gets weird. Some of the lights in an object are “detached” by X-Plane from the OBJ and stored separately in the scenery. We do this for performance – the detached lights can be fed to the graphics card via a different mechanism that is much faster than regular OBJ drawing. One of the effects of light detachment is that the detached lights are no longer limited by the LOD of the object. They instead are drawn to much further distances. The fixtures of the objects, however, are never detached…thus some of the airport light OBJs in X-Plane are only visible to 500 meters. We can get away with such a low distance because the light bulb itself is detached and will remain visible.
So which lights are detached? Well, it depends on a number of factors – lights are only detached if they are not subject to animation and they are simple enough to be drawn in bulk. Which lights are these? It’s hard to predict.
So the airport beacon and taxiway light work differently; the taxiway lights are very simple and are detached – hence they are visible a long way away. The airport beacon lights are animated (the light bulbs rotate with the fixture), and are never detached. Thus the airport beacon is subject to LOD constraints and taxiway lights are not.
If you set the world level of detail setting to “low” or “very low” it simply reduces the LOD ranges of all objects. Thus on “very low” the airport beacon may be seen to disappear before the (detached) taxiway lights. For beta 11 I have tried to set the airport beacon LOD large to be enough that even on such low settings the beacon will be visible farther away.
There is one more piece to the puzzle: all lights become dimmer with distance. So in theory our hope is that the lights will become fully dim due to distance before we stop drawing them with LOD, producing a gradual fade-out rather than a sudden disappearance. But if we don’t tune all of these parameters right, lights can randomly appear to disappear in the distance instantaniously.
If there’s a moral of the story, I’m not sure what it is, except perhaps: this new light system is very new, and I am sure our artists will tune it a bit over the next few versions of X-Plane, helping to hide these implementation artifacts.
EDIT FROM 2/19/07: during X-Plane 850 when I was developing the new lighting system (particularly used for airports, but also for the rest of scenery) I brought up the subject of “detachment”, a internal process by which the X-Plane rendering engine processes lights.
Simply put: detachment is virtually never a factor for scenery authors. Back when I wrote the article, it was possible for an author to make a few special optimizations if he or she knew about detachment. This is no longer true! The sim will correctly optimize all lighting cases as much as possible without any special help from the author.
So….the blog article in its original form follows and may be useful as an insight into how X-Plane works, but as an author, just remember: you don’t need to do anything – just make nice OBJs.
I think I’ve confused just about everybody in the last few days – especially Sergio and Austin – with work on the new lighting system. One reason I’m so scrambled: the internal representation of lights in X-Plane is very different from the commands you can put in an OBJ8 file. So there’s a whole set of terms and ideas that are important to how X-Plane works that I shouldn’t have mentioned to anyone making OBJ8s because they won’t even be part of the file format.
Then there’s detachment. I think I can explain it simply like this: detachment is when X-Plane changes the order that lights are drawn inside an OBJ and the LOD ranges in which they are drawn to improve framerate.
X-Plane 840 does not do detachment. X-Plane 850 will probably not do detachment for objects made only with the old lighting commands. But 850 will do detachment for objects that use new (to 850) lighting commands, and this will allow those objects to render very quickly even with textured lights.
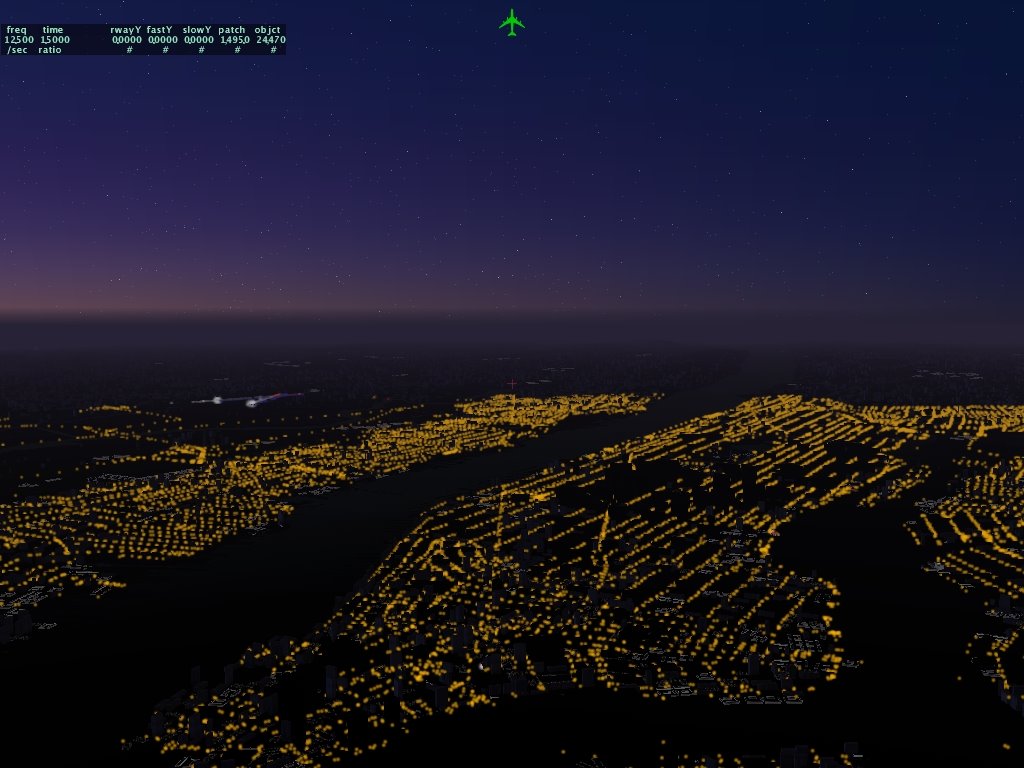
This picture is actually from X-Plane 8.03 I believe. It’s a simple trick: edit the roads file to add street light objects along all roads. Make a street light object with a light command and then turn roads on and watch teh city at night appear.
The only problem is the frame-rate – this experiment brought 8.03 to a standstill.
The goal of detachment is to make textured lights in objects fast enough that this kind of scene can be rendered at reasonable framerates. I do not know if this will be possible, but detachment should certainly improve performance in cases like this.