We had a request for information on the popular airports, so here’s a small addendum to the usage data from a couple weeks ago. We don’t currently track whether the airport is a default, Gateway airport or an add on, but we do have it on our radar to track the most popular add ons in the future.
We’ve filtered out demo users again, and this information is for the entire life of X-Plane 11 (1 Nov 2016 to 21 Nov 2017) since we’ve never published airport data before. I’ve only pulled the top 50 airports for this list, but we track 11,281 locations. Read More
I hate finding out about these kinds of bugs late in the beta. But this one was pretty big.
X-Plane uses a “metalness” material model. Metalness is a fairly standard material model that recycles the albedo of your material to implement both dialectrics (non-metals) and metals. It works like this:
Non-metal: diffuse light is tinted by the albedo texture. Specular light is not tinted.
Metal: there is never diffuse light. Specular light is tinted by the albedo texture.
In other words, since metals don’t have a diffuse component, we recycle the albedo to save texture space.
The bug in 11.05 is that for a pure metal, the albedo was tinting ambient light but not the sun itself. A third party developer sent me a test model that showed the problem – here’s the before and after.
11.05 – sun spot is white.
11.10 – sun spot is red.
That weird set of colors on the top of the helicopter body is due to the white sunlight being added to the red body. The red aircraft body is lit by ambient light reflected directly off of the environment. The runway stripes are not visible because the metal is about 30% rough, diffusing the reflection.
(One of the confusing things about PBR models if you are not used to them is that the environment itself can cast both diffuse light and specular reflections off of a material, and if the material is rough, it can be hard to tell them apart. Diffuse light is always widely diffused, no matter how glossy the surface.)
Alex and I took a look at some of our legacy aircraft and found that fixing the lighting didn’t make too much of a difference for metals that are not tinted.
MD-80 11.05
MD-80 11.10
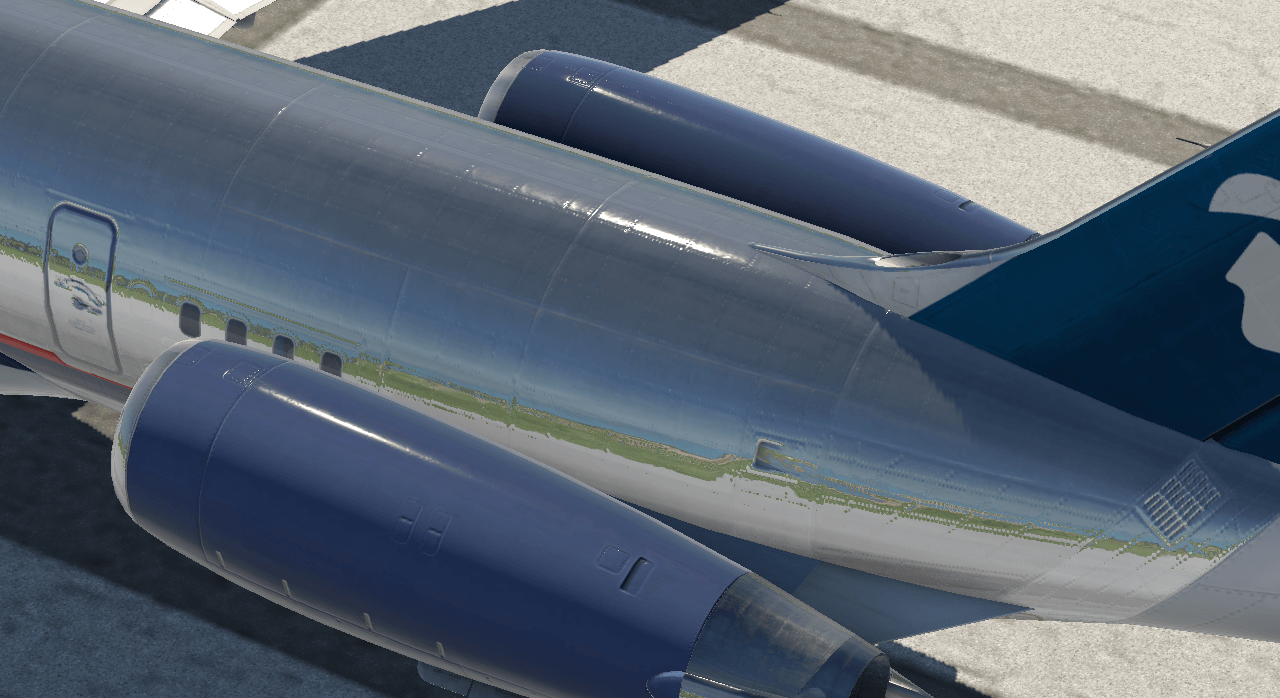
737 Engine 11.05
737 Engine 11.10
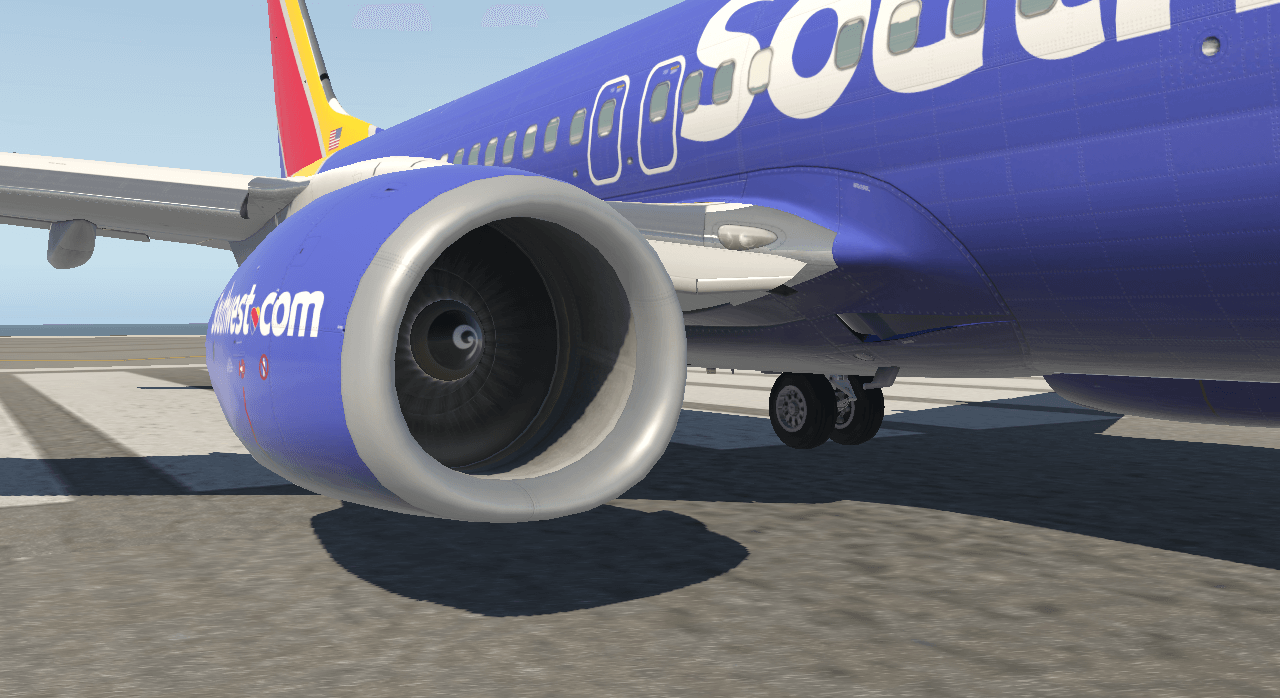
737 11.05
737 11.10
Since our aircraft don’t have any “tinted” metal there isn’t much change. Note that in real life heavily tinted metals aren’t common. The cases you might have are:
Approximations of metals with complex spectrum-dependent fresnel like gold.
Composite paint, e.g. like for your car, with fleks of metal and translucent dielectric polymer mixed together – that’s the case where this really helps.
As I wrote this up I realized that the spot lights are still wrong in beta 8 – they’ll be fixed for RC1 unless people really need the old model, in which case we’ll have to put some versioning in. My guess though is that anyone doing composite paint realized it was impossible in 11.05 and hasn’t shipped anything like that yet.
Plastic on top, metal on bottom, 11.05
Plastic on top, metal on bottom, 11.10
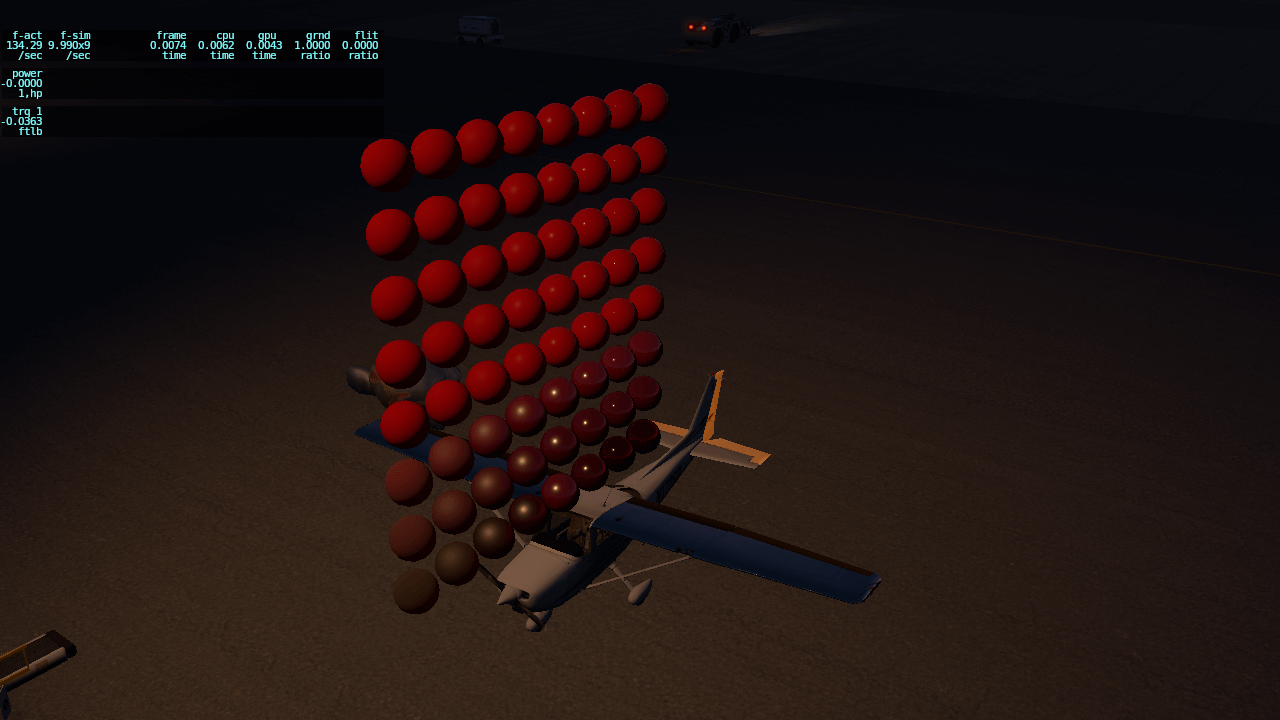
Red material, varying metalness and glossiness, 11.05
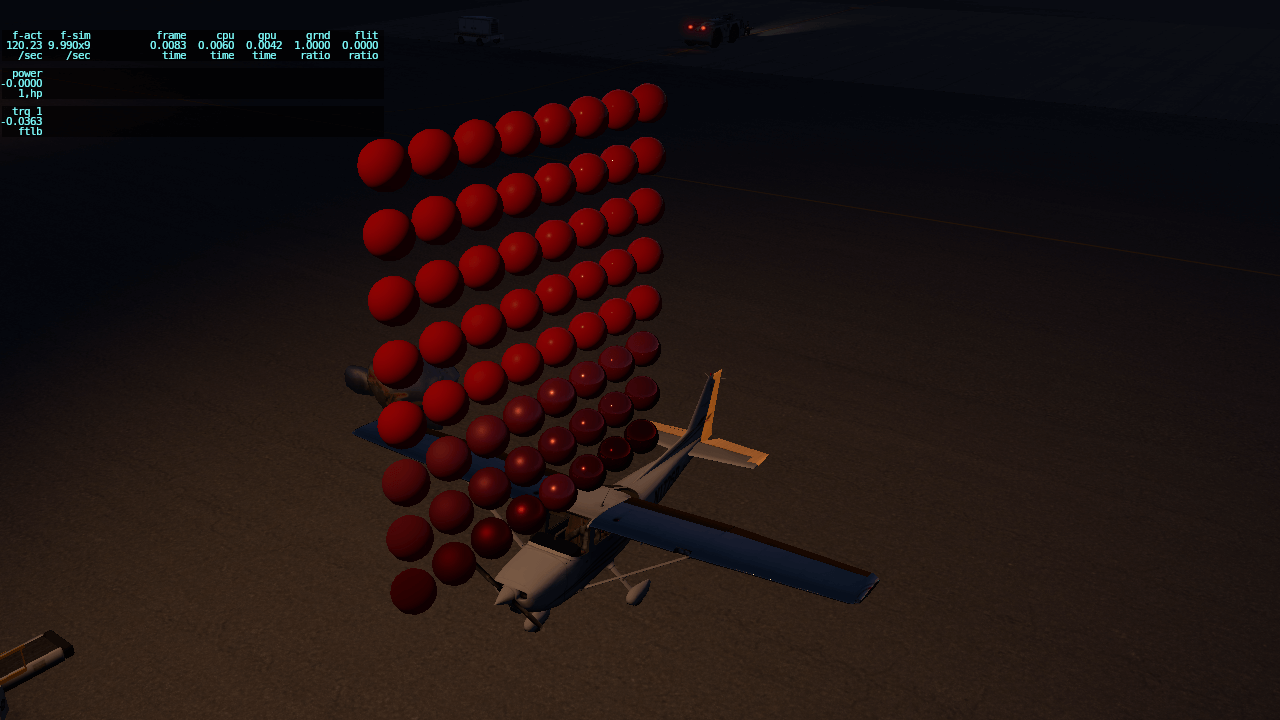
Red material, varying metalness and glossiness, 11.10
In these comparisons we are under an airport light viewing various materials. In the multi-color case the bottom row of materials are various “metals” with light tinting to simulate copper, iron, gold, etc.
In the second set of cases (all red) we have a 2-d grid: metal on the bottom, dialectric on top and rough on the left and glossy on the irght. Note that the reflection of the overhead light is reddish for the metals and white for the plastics in 11.10 (correct) but all white in 11.05 (incorrect).
We’re mostly down to small bug fixes – no more big flight model changes.
The next build will probably be 11.10rc1.
We’ll get Steam updated in the next few days – Philipp’s been traveling a lot.
There are no remaining major enhancements that have to go into this beta. Here’s how some of the big technology changes played out:
The new manipulators are in – I’ll write up a separate post tomorrow on those. They went into beta 6 (hence all of the weirdo bugs) and are now fully working.
All of the new weapons code is in – dataref access to weapons is restored. Jörg has a few crash bugs to nail down with networking and weapons, but that’s it.
Audio events had to wait – I’ll write that up in a separate post. They’re something we wanted, but realistically we never had time for them in 11.10.
The last round of performance enhancements for graphics is going to wait for the next release patch.
The bad news is: AMD users aren’t running 11.10’s fastest path due to problems with our current code and drivers. The good news is: the next round of enhancements do work with AMD cards, so we can get back to treating them normally. That code is now looking reasonably stable, but it wasn’t stable early enough to make it into 11.10. I think it will be available in beta this year though.
Finally, there was an open question of how to use glScissors in a plugin with the new UI features (e.g. floating windows, multi-monitor, 150% UI, etc). As of beta 8 this is fully possible; I just need to get the sample code to Tyler to post.
Two flight model notes for aircraft authors – the executive summary of all of these is pretty much “it should just work and you don’t have to do anything.”
Steering Gear Rate Limiting
X-Plane 11.10 has an option to rate limit how fast gear that steer can turn. This is a good thing – in the real plane you just can’t turn that tiller very fast, but if you have a $20 Microsoft Sidewinder from 2002 with the throttle tab broken off (for example) you can twist it to full deflection almost instantly. When this happens, X-Plane turns the wheels instantly, and since they’re not at a 70 degree angle to your movement path, they skid like Ken Block landing a Baron. Once the wheel is in skid it has pretty much no ability to turn the plane and you just skid.
With rate limiting, the wheel will turn a little bit, and be able to put out side force, helping the plane begin to rotate. As this happens, you can turn more and gradually angularly accelerate the aircraft into a turn.
So … rate limiting is good – you should use it! But the compatibility code in beta 7 was pretty broken – it set the minimum rate to 1.0, which is way too slow for a bunch of aircraft.
Beta 8 fixes this – the minimum rate is 0 (meaning no limiting) and this is the default for 11.05 planes.
Here’s the warning: if you saved your aircraft in an earlier beta, you’ve baked in the long gear deflect time – you’ll have to go into Plane-Maker and turn the value back down again.
Just One Turbo-Prop Model
X-Plane 11.10 had two options for free turbine turbo-prop engine models: the “v10” and “v11” models; all 11.05 planes showed “v10” when loaded in Plane-Maker.
We’ve backed this out – there’s just one model, “turbo-prop (free)” in beta 8, and if you picked the v11 model, we’ll mark it back to v10 for you. (You shouldn’t be shipping aircraft saved in a beta anyway, but we check for this in the sim itself too.)
Here’s the back-story: X-Plane models the compressor turbine speed of a free prop turbine like the PT-6 as “N1” and the prop turbine speed as “N2”. Austin has come to regret this decision, as the prop turbine is a lot more like the turbine that drives a bypass fan in a high-bypass jet engine, and the compressor turbine is a lot like the turbine that drives the core in a high-bypass jet engine.
So Austin cut a new version of the engine model with N1 as the prop and N2 as the compressor, exactly backward from 11.05.
The thing is: while the new model matches Austin’s brain, it doesn’t match any aircraft ever made, and swapping N1 and N2 in an add-on is a pretty expensive update. Realistically we’re not going to ever deprecate the old model for the new one in any time frame if this much rework is needed.
So we’re keeping the new model ‘in the lab’ and not releasing it for now, as it doesn’t have significant changes in how it models the engine itself yet. This frees Austin up to improve it on his own schedule and frees us up from having to maintain another point of version compatibility. Since the new model doesn’t have any enhancements (other than renaming N1 to N2 and vice versa) you’re not losing out as an aircraft developer here.
One big massive bug fix! (and some optimizations!)
#264 caused some people’s lights to be put in the wrong place. The fix involved Ben coming up with awesome math to put things back in their place by a certain offset, and then us creating a way to parse the light.txt file that controls much of the lighting in X-Plane.
This Changes Nothing in Your Blend files!
Seriously! No Blender data should change!
However, It Could Change Your OBJs
XPlane2Blender is now more consistently WYSIWYG! Meaning that if you point a spotlight at a wall, it should show up pointing in that direction, regardless of what a named spill light thinks or the parameters of a param light think.
This is good news for new authors and authors suffering from the bug, but depending on how you’ve been making your lights appear rotated, it could result in needing to change the rotation or parentage of existing lights.
What Lights Are Affected?
All of the following conditions must be true for a light to be affected by this change
Be a Blender non-point light, for instance a spot light
The light’s XPlane Type must be Named or Param
The light’s XPlane Name must be found in the lights.txt file inside the addon’s new resource folder
In rare edge cases, special and less used lights will be excluded from auto correction.
So, as you can see its either somewhat common or very specific which lights are affected. So, if your eyes haven’t glazed over yet,
Please Send Reports Of How This Affects You – Good, Neutral, Or Bad!
We try our best for backwards compatibility and a bug free existence, but we don’t know everyone and their situation until they say hi! If you are faced with large hurdles to continued productivity, please file a bug! Preferably with before and after pictures and .blend files. Automated fixes may be developed for people affected.
This is just one step to a more WYSIWYG XPlane2Blender.
It took me a bit longer than I would have liked to compile the graphs while working around the 11.10 beta, but we now have a handful of easy-to-digest charts, plus the raw data at the bottom of the post for those that are interested. Read More
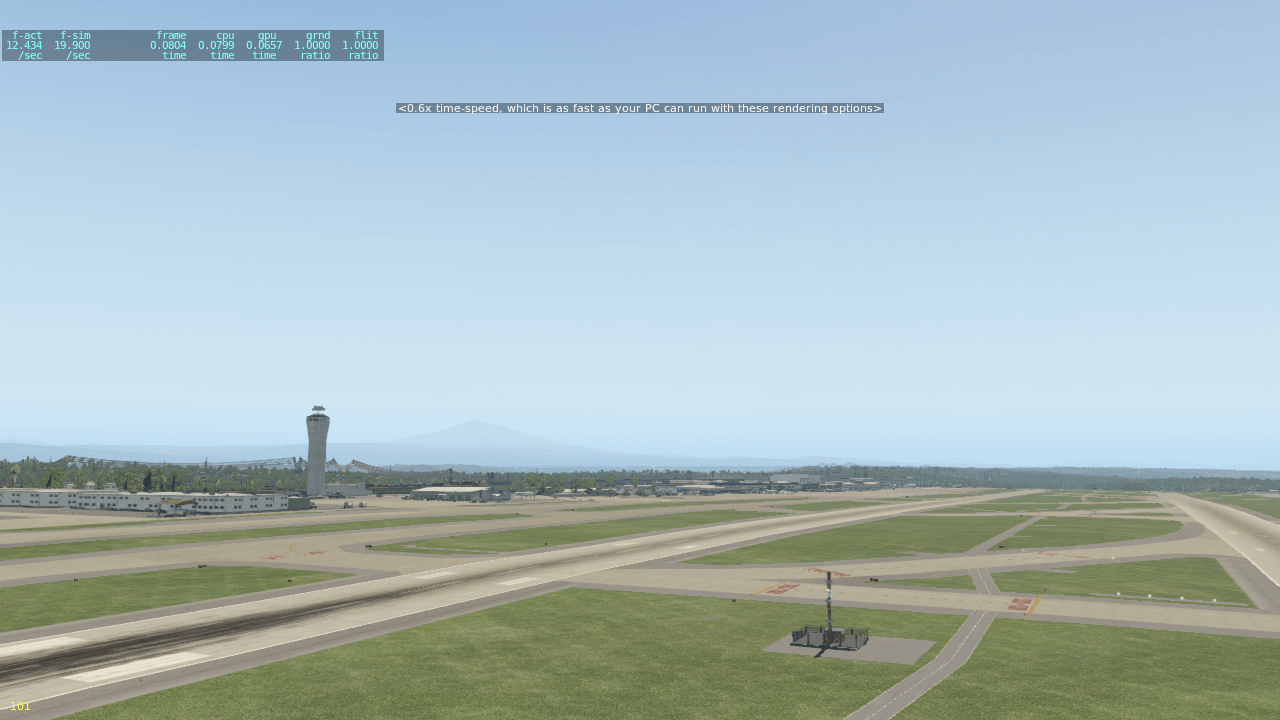
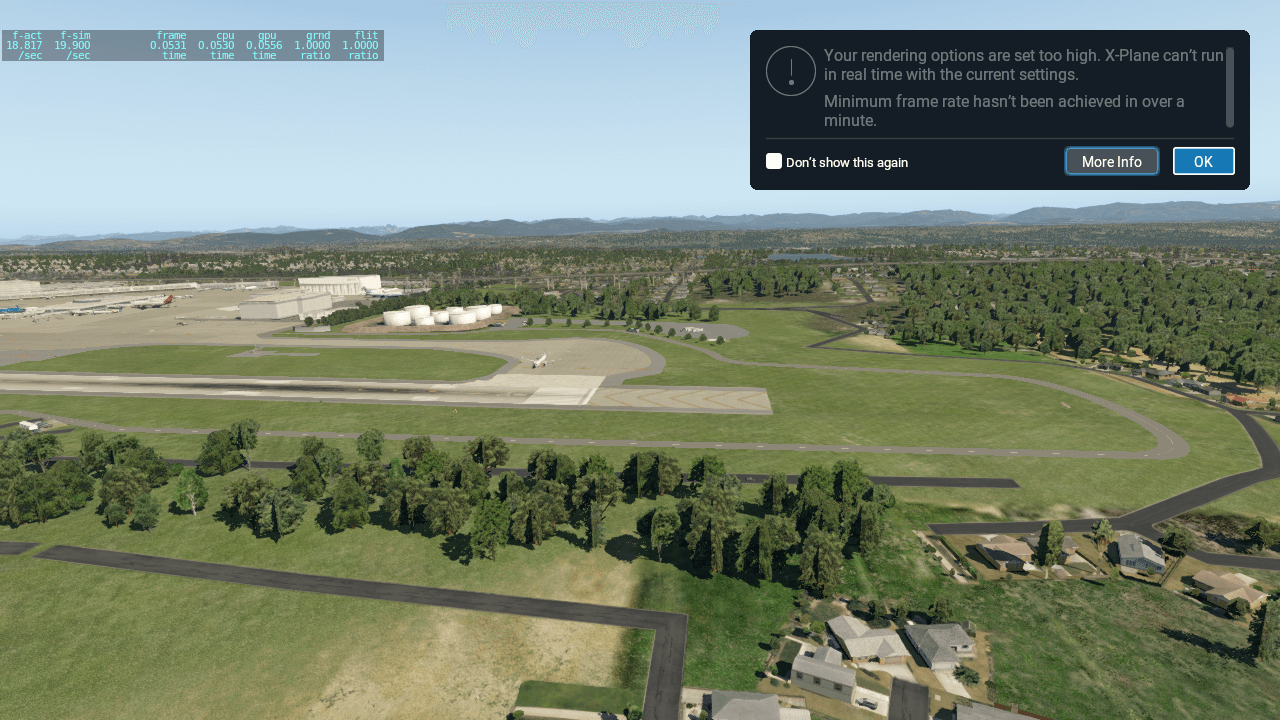
Tyler heard your pain (as did the rest of us, as we received approximately 8,414,493 requests to kill the FPS nag) and we have changed the low frame-rate warning from the perpetual flashing “you’re too slow” shown on the left to the pop-up warning on the right. And if you like flying a slide show, you can click “don’t show this again” and … we won’t!
The new warning is a bit more conservative – you should only see it if you’ve got persistently low framerate – a transient dip due to texture paging should not make it pop up. If you see it appearing spuriously, please file a bug. In these pics I’ve set my poor 3-year-old iMac to maxed out AG, maxed out shadows and maxed out shaders all at once with the 747 to dip below 20 fps.
The rest of this post discusses the “why” behind this dialog box.
X-Plane Requires 20 fps (or: How Did We Get Here)
X-Plane has some fundamental rules about how it simulates flight – these are our design parameters.
X-Plane simulates one physics frame and renders one graphics frame in lock-step – physics and graphics do not run independently.
X-Plane’s physics model will not “step” the simulation forward more than 50 ms in each step, to avoid computational flutter and other flight dynamics problems.*
X-Plane allows you to set your rendering settings as high or low as you want, even if you don’t have hardware that can render a graphics frame at those settings in 50 ms.
If you consider all of these things, you can see the problem. You can crank up your settings on an old machine and the rendering engine needs more than 50 ms but the physics engine won’t simulate more than 50 ms in a single step.
X-plane does the only remaining option: if your computer cannot sustain 20 fps rendering, your flight will be simulated slower than real time. For example, at 10 fps, a flight from Boston to JFK will take 90 minutes, not 45.
It turns out that lots of X-Plane users don’t know about this behavior, and as a result, Austin receives a steady stream of emails complaining that the sim is unrealistic because en-route times are too long – virtually all of them are caused by low fps.
So for 11.10, Austin did what Austin does: he put a big loud message on screen to tell users that they were below real-time simulation.
We Should Probably Say Something
The result of this message was not users going “oh, I’ve learned something, I’ll turn down my rendering settings.” It was a huge number of bug reports that X-Plane 11.10 had catastrophically worse FPS than X-Plane 11.05. In many of these cases, users thought they were getting 20 fps because the flight model reads 20 fps in the time window data output (a very confusing display) and there is no bitch-o-gram.
I considered the option of just nuking the message a second time, but there may be problems with running at low fps that users don’t realize. For example, if you’re on VATSIM doing 170 knots on final like the controller asked at 10 fps, you’re doing…85 knots and your 737 is looking a lot like a C172.
So we went with Tyler’s popup + never-show-again design; it brings the issue of low fps to the surface, but lets users dismiss it forever if they can live with non-real-time simulation.
Why Don’t You Just Split the Physics and Graphics
When discussing this with users I did get asked a lot, “why don’t you run the physics and graphics independently so we can run in real-time at < 20 fps”. There are a few reasons why we did not (and are not) considering this approach.
Separating the execution of the physics and graphics code would require significant engineering work – right now they run in an alternating pair, and therefore they don’t need to be coordinated at all. Once they run independently, a bunch of new code is needed to mediate their interaction. That engineering time would take away from just making X-Plane faster.
The cost in CPU time of coordinating the independent FM and graphics would not be free, so this would make the actual frame-rate for the sim worse in pretty much all cases.
Our goal is to make X-Plane run at 60 fps, and we consider 20 fps (the minimum) to already be really quite awful. So we really want to focus on making X-Plane faster, not on making it work better at a frame-rate where the user experience is very sub-standard.
So we’re going to keep focusing on performance optimization that will benefit everyone and not take a side-tangent into making 15 fps flight run in real-time.
* If the time between frames is too large, self-damping forces on the aircraft and feedback-based control systems will not react properly because they will not respond quickly enough, due to there being no simulated frame shortly after a large force is introduced. The result can be incorrect handling at the outside of the flight envelope, for example.
TL;DR: Running X-Plane with sudo is a bad idea. Instead, create proper udev rules (per this and this).
During the 11.10 beta, I’ve gotten a lot of bug reports from Linux users who report that their keyboard is being recognized as a joystick. This is… sort of a bug, but mostly intentional.
(If you’re not a Linux user, this won’t apply to you… but it will bore you! 😉 )
Background: What changed?
On Linux, prior to X-Plane 11.10, we were very picky about what USB devices we considered to be a joystick: we required a device to present a so-called “absolute” axis (in contrast to a “relative” axis like a mouse uses). The downside of this is that it prevented home cockpit builders from creating button-only hardware.
So, in 11.10 and beyond, we relaxed the requirements: if a USB device presents us with either an axis, button, or hat switch, we’ll treat it like a joystick.
The problem with this policy seems obvious: keyboards have “buttons”! Like, 104+ of them!
The reason we didn’t worry about this is that the keyboard is only accessible (as a USB device) to programs running as root. So long as X-Plane runs as a normal user, it doesn’t even have the option of treating the keyboard as a joystick.
Why do people run as root?
The impetus for running as root (via sudo) is simple: if your Linux distro doesn’t recognize your joystick hardware as something that should be available to normal applications, running as root is a brute-force way to let X-Plane use your joystick.
Let me say emphatically: This is a bad idea.
Especially with early, buggy betas, running as root makes it possible for X-Plane to do way more damage to your system than would ever be possible as a normal user. Consider the unlikely—but possible!—scenario where somebody made a typo in the code which inadvertently tries to delete a system folder. There are two possible outcomes here:
If you’re running as a normal user: Nothing happens. The operating system refuses to let X-Plane hurt your system.
If you’re running as root: The operating system silently obeys. You curse X-Plane for breaking your system.
Running X-Plane as root is like giving a blank check to every cashier you buy something from—it’s way more power than they need to do their job, and it’s liable to burn you at some point!
The Right Way™ to let X-Plane use your joystick
As described in the latter half of this old dev blog post, you don’t have to run with sudo. Instead, you can create udev rules to tell your operating system to let normal applications use your joystick. The GUI tool linked at the end of that post makes it even easier.
(Some users found the instructions there confusing; this post on the Org might help.)
Remember that after you create your rules, you can even submit them to your distro to make life easier for other flight simmers!
There’s one hitch: after running with root, your file permissions (especially your prefs) may have gotten screwed up. This can be fixed from the terminal by making your normal user account the owner of your X-Plane directory, like this:
X-Plane 11.10b4 is out. The release notes have complete bug fixes (we try to list everything; Jennifer works off the bug base and the GIT commit log), but two big fixes:
Austin fixed a crash for aircraft with zero stall speed. If your aircraft was crashing 100% of the time in b3, please re-test in b4 and file a new bug if you still see a crash.
Plugins using widgets were being subject to the new scaling/multi-monitor capabilities even if not re-compiled against the new SDK. We think this caused a ton of plugins to stop working.
Widget-based plugins now do not scale. The widget drawing code path, as it turns out, is totally not ready for UI scaling or multi-monitor.
If you found any problems using plugins (mouse clicks not working, double drawing, things disappearing) and you still see them in beta 4, please re-report a new bug based on whatever you now see!
Plugin authors: our intent is to not scale widget-based plugins – the widget drawing path is full of assumptions about the drawing environment, and the code is split between plugins, public libraries, and the DLLs in X-Plane itself.
Our long term intention is not to upgrade XPWidgets, but rather to offer some kind of modern replacement that leverages our UI, is easier to use, and is compatible with all of the modern facilities in X-Plane.
Unfortunately that doesn’t leave widget-based plugins with a lot of good options in the short term. As a plugin author you’ll need to look at the scope of your UI and decide whether you’d rather recode it in straight XPLMDisplay APIs or wait until an XPWidgets replacement is available.
As we move forward with the beta, we’ll write up some posts on X-Plane 11.10’s the new features – there are a lot of them, to the point where I’ve lost track of what’s actually in the release. Right now we’re in the “does it work” phase, trying to get a beta that works for everyone without crashing. (Beta 1 worked fine for everyone in the company, but often our internal machines are very similar to each other, so early betas catch things we missed.)
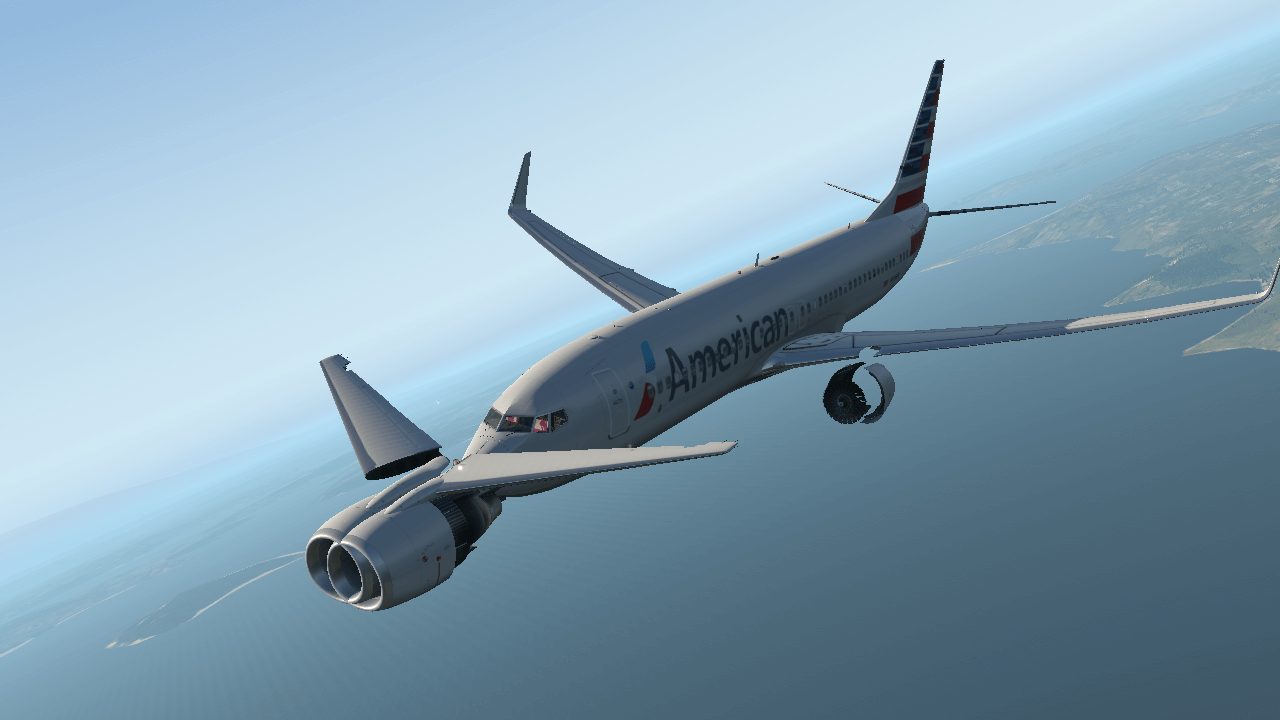
So what follows is a big pile of nerdy stuff…I’m going to add random images in to make the post less boring. So picture is not related.
Where Do The Bugs Go
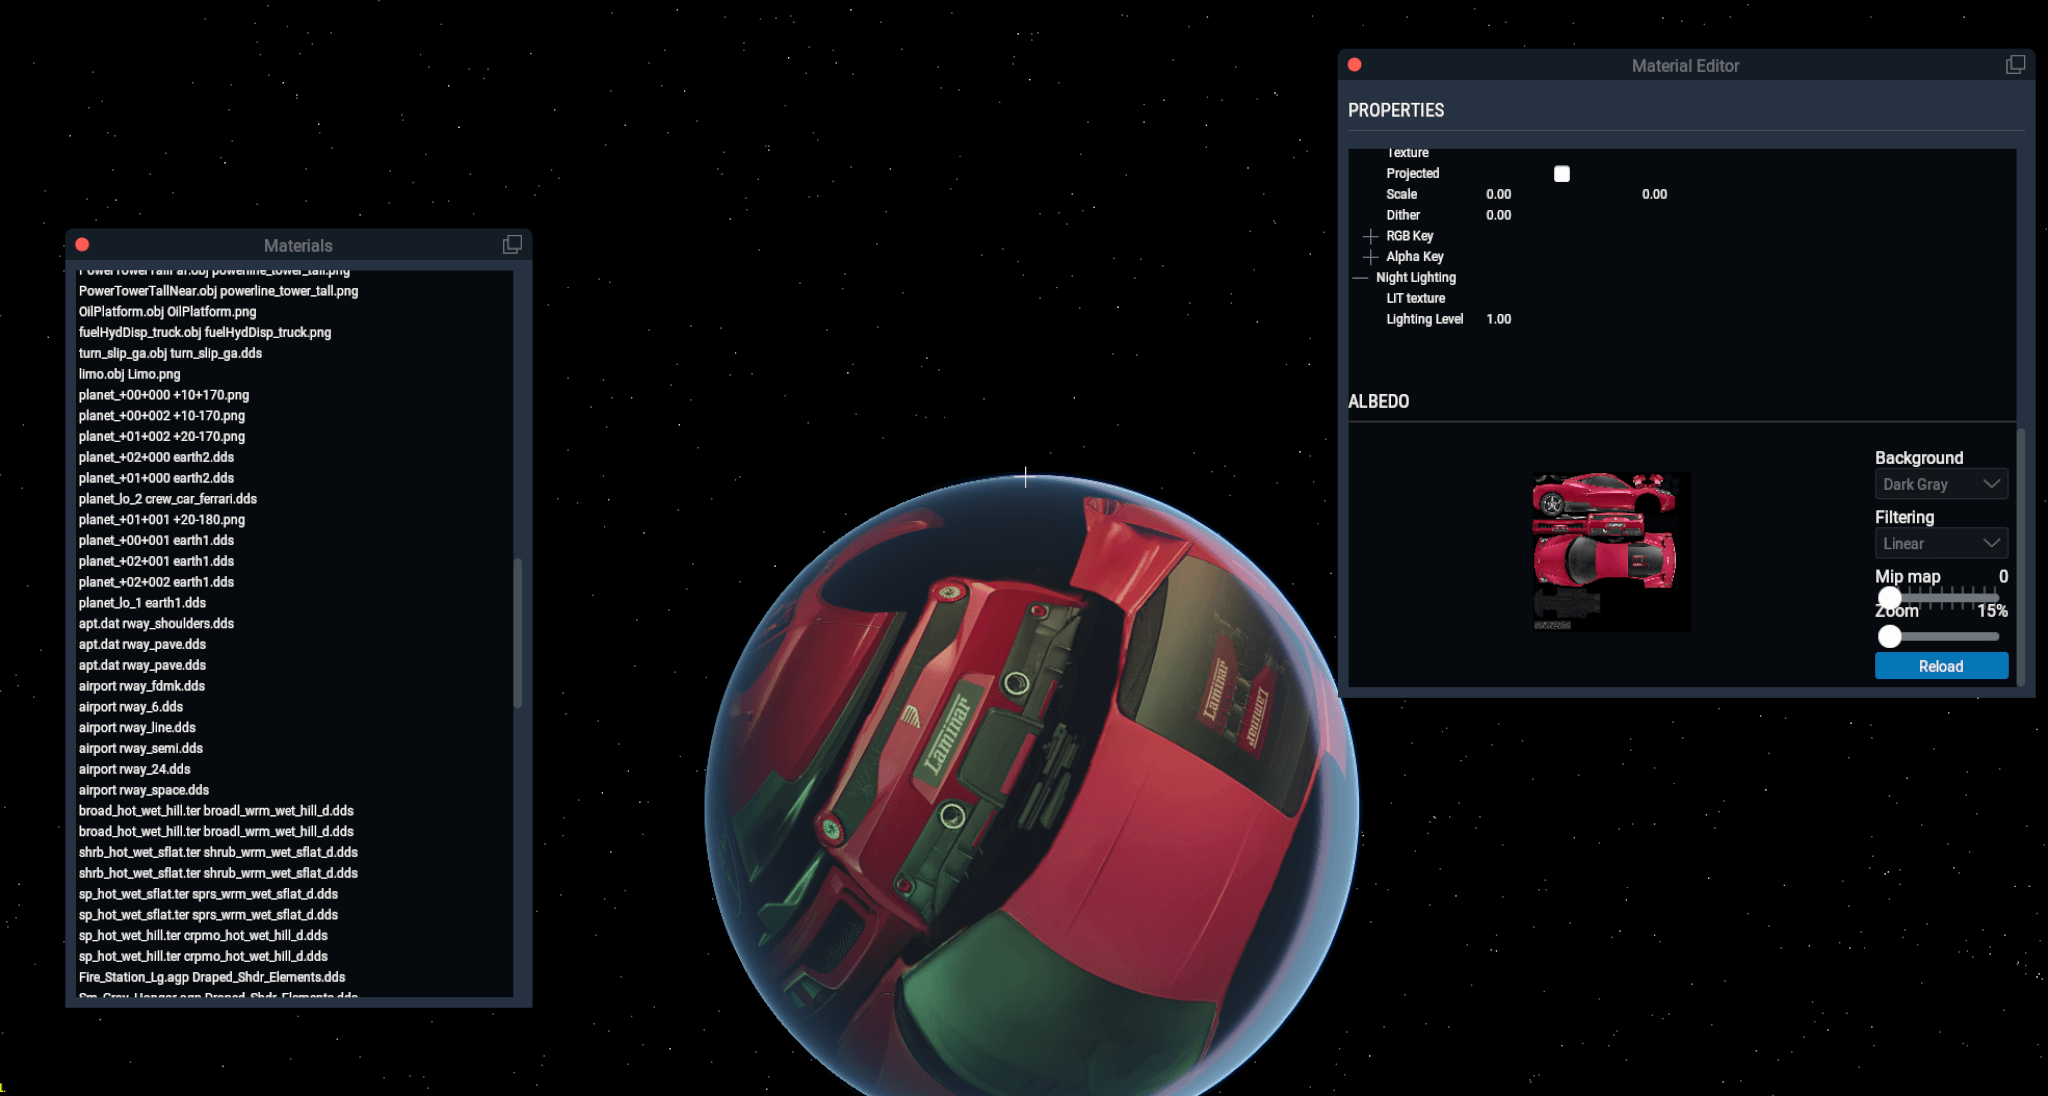
Planet Ferrari
When you file a bug with our bug report form, it goes to a shared email in-box that someone triages – usually it’s Jennifer, but sometimes it’s me or Philipp. The person triaging the bug will then forward it to our internal bug tracking system (that’s where those XPD-123 numbers come from) or possibly forward it to tech support – we do get a lot of “my sim is broken, help!” in the bug reporter.
This is why I always jump up and down and go “file a bug!”: everything in the bug reporter gets looked at, and everything that is then filed is permanently tracked. At the end of 11.10 we can check the bug list and see what hasn’t been fixed. Like all software, not all bugs will be fixed by the end of 11.10, but if the bug is tracked, this avoids us losing the bug.
Here are some ways to report a bug that are not tracked and are extremely likely to get lost:
Posting in the blog comments section. We do not ‘scrape’ the blog for bug reports. If you write a blog comment and do nothing else, your bug will not be fixed.
“Reporting” the bug on a public forum (x-plane.org, reddit, etc.). We don’t scrape those either, so it’s quite possible no one will see it.
Emailing an engineer at Laminar Research directly.
Night Vision Deserves a Quiet Night
The problem with direct email is that it doesn’t go through the tracking system, you might not get the right engineer, and again, you’re bypassing the mechanisms we have in place to not lose things. If you email someone organized and responsible like Tyler, he might file the bug for you. If you email someone like me, whose in-box looks like a grenade went off, there’s a very good chance I lose your report.
Jennifer tries really hard to list every item that is fixed in each beta, so that you can tell when your issue is fixed and it’s worth re-testing/re-reporting.
This system is far from perfect, and the number one request we get which is reasonable is better linkage between the internal tracking and the user reporting. I sympathize because we have the same problem of “it’s a black box” with the technology vendors we depend on (Apple, Microsoft, Intel, AMD, NVidia).
Changing How We Build
737 With Canards
With X-Plane 11.10 we moved to cmake for our build system. Previously we would maintain separate project files for all three operating systems. That’s about 3x the amount of work it should be, so for 11.10, Sidney and Jörg moved us to cmake, which lets us manage X-Plane as a project once.
The down-side is that there have been a number of serious one-time bugs due to projection configuration problems, since using cmake meant rewriting all of the configuration info for building X-Plane. This is what caused the Linux bug in beta 1 that we required libc++ (fixed during 11.00’s beta process, it popped back up when we replaced makefiles) as well as a number of other random bugs we fixed before public beta started.
In the long term cmake is a win – having gone through the pain of the migration, it’s just quicker for us to administer X-Plane’s project files, which means more coding and less fighting with X-Code, MSVC, etc.
More Robots
The Sky Shader is Out Of This World
In the last few months we’ve automated our build and our packaging process, as well as the amount of testing done automatically by the build system. Hopefully this will turn into bugs being caught earlier, and it makes it easier to cut new betas – getting quick betas out to fix crash bugs wasn’t time consuming. I expect the beta count to be higher for 11.10 than in the past due to the lower cost of recutting the build.
(If I had to cut five betas in a week for 11.05 I’d be pretty cranky at everyone – five betas in a week is totally doable now.)
Graphics Cards That Remember
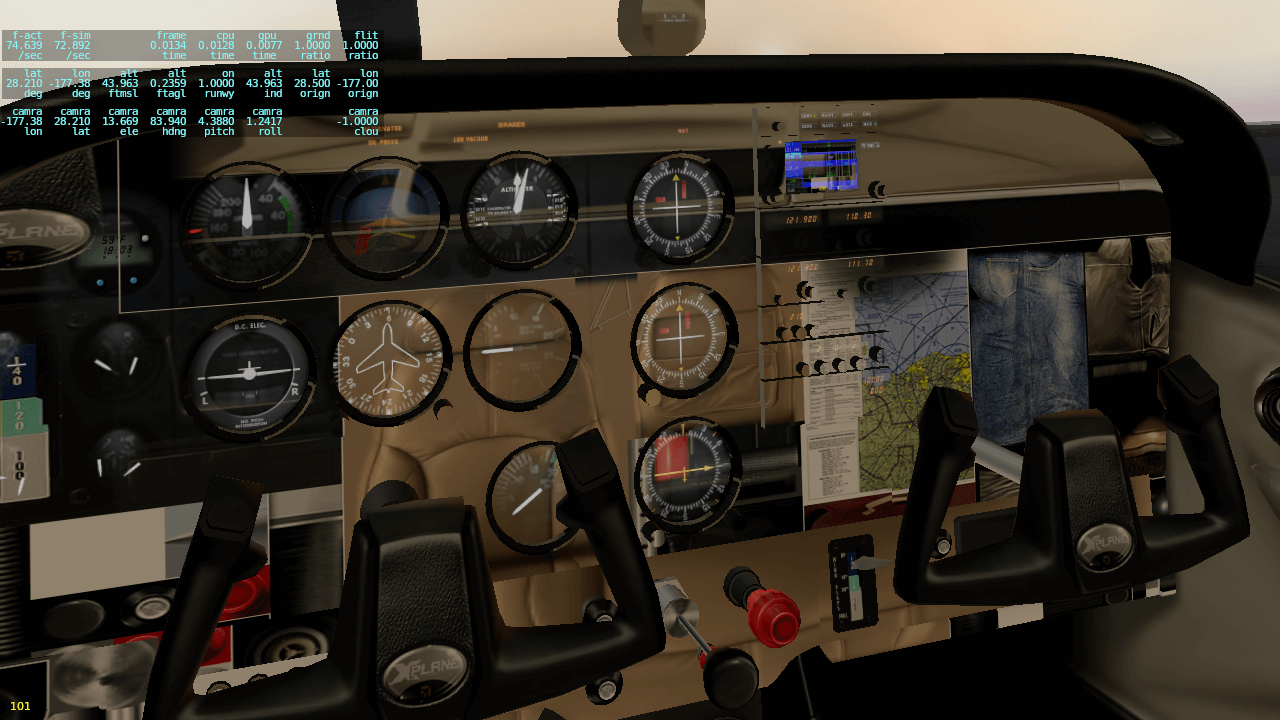
You Put Your Map In My Cessna
Before X-Plane 11.10, X-Plane would set up shading for a given material by telling the graphics card about every aspect of the material. Over and over. Every time the material was used. For every single frame. For every single view in the frame.
X-Plane 11.10 now stores parts of the materials in VRAM, so they can be referred to as needed. This is part of our restructuring of the rendering engine for VR, Metal and Vulkan.
Monkey See, Monkey Do Silly Things With Substance Painter
This was also the cause of the “invalid UBO” errors in beta 1 – now that we are saving materials and not just reiterating them per frame, we have to get the book keeping right. Sidney set the sim up to crash if the book keeping is done wrong. (This is a good thing – the sim is going to crash anyways if the book keeping is wrong — at least this way the auto-report explains exactly what happened, rather than us having to autopsy the resulting carnage and squint to find the root cause.)
AMD Users: this code is not working on AMD cards right now, which means you aren’t seeing some performance improvements. We’re working this week to see if we can get this going on AMD cards too – stay tuned.
I just cut a quick new beta build of X-Plane 10.11 – Jörg fixed the Linux crash. The crash was a problem with the plugin .so’s and we don’t even know how the bug happened, but it’s fixed now.
Linux users: since the crash is at startup, you won’t be prompted to auto update (because X-Plane crashes before the auto-update check can run). So to fix your beta installation, re-run our installer and pick “update x-plane” with the beta box checked. You’ll get beta 3 and be back in business.
We’ll fix more bugs next week, and the rate of betas may slow down, but we’ll try to patch crashes as quick as we can.